Overview
A Scenario is a set of Status Checks and Gremlin attacks that you define with a name, description, hypothesis, and detailed results. Once created and configured, a Scenario is run through a sequence of attacks with an expanding blast radius (number of hosts included in the attack) and magnitude (intensity of the attack). After each run of a Scenario, you can easily record your observations as well as edit the Scenario to expand the blast radius and magnitude to iterate on the experiment.
Scenarios can be used to recreate a past outage that impacted your system, or it can be used to automate a sequence of attacks to iteratively grow the blast radius of a Chaos Engineering experiment.
Creating a Scenario
Name, description, and hypothesis
Create a Scenario by entering a name to identify your experiment. The description and hypothesis are optional for running the Scenario but help to describe and formulate how you expect your system to behave. For the description, it's helpful to include services you're testing, use cases for the Scenario, or when, and when not, to use that Scenario. For the hypothesis, think through how you expect your application or environment to behave when a sequence of attacks within your Scenario is run. How will your system react to the failure modes you'll be exposing it to? Is your system designed to handle this type of failure? If so, is the system working as designed?
A hypothesis can be useful to record and validate expected behavior and assumptions about your system to see how actual behavior may differ from what is expected.
Status Checks
Add a Status Check to your Scenario to set up automatic halt conditions to safely stop the Scenario, validate your system is in a steady state, or validate your system returned to normal after an attack before continuing to expand the blast radius and magnitude of impact with an attack.
Attacks
Start crafting your Scenario by either adding a completed attack or by creating a new attack. Selecting the option to add a completed attack will show you a list of all attacks that have run in the past. Find the attack you'd like to add to the Scenario and choose targets to impact. Once you've selected the tags of hosts to impact, the attack will be added to your Scenario.
Alternatively, to start with a new attack, add a new attack to the Scenario. Select the tags of hosts to impact, followed by the attack type and configuration options.
Continue to add as many attacks to the Scenario as you like, changing the tags of hosts to target and attack configuration as desired to grow the blast radius. You can also add multiple attack types to recreate incidents with multiple failure modes, introduce cascading failure, and ultimately build Scenarios that make use cases easy to develop.
A delay of 5 seconds is added between each attack you add to the Scenario. This delay can be set to any number of seconds, minutes, or hours.
Targets
Use tags to select targets for attacks within your Scenario. By default, no hosts or containers are selected. This is done for safety to prevent users from accidentally attacking all targets. To expand the blast radius of the attack, select one or more tags per category.
The Exact targeting method is not an option for attacks within a Scenario, tags must be used.
Drafts & Archive
Save the Scenario to have it enter a draft state. The Scenario will be visible in the list of Scenarios and the attack configuration can continue to be edited.
When a Scenario is no longer relevant or needed, you can archive the Scenario to remove it from the active set. Navigate to the Archived tab to view these Scenarios. Unarchive a Scenario if you'd like to return it to the set of active Scenarios.
Running a Scenario
To start running through the sequence of Status Checks and attacks defined in a Scenario, run the Scenario from either the Scenario configuration view or on each Scenario card. A Scenario will show that it's running with a message at the top along with a Halt Scenario button. Halting a Scenario will halt the attack underway, along with the Scenario itself so that no further attacks will begin. The active attack within the Scenario will be visually indicated. As each attack progresses, the state and logs of each attack are available.
Editing a Scenario
To edit a Scenario, open the Scenario you want to edit, and click on the "Edit Scenario" icon. You can also edit a Scenario from the Scenario list cards. Hover your cursor over the card to show the overflow menu. Click the overflow menu icon and select “Edit". This will pull up the latest configuration of the Scenario and allow you to change any Status Check or attack parameter and targets. The Scenario can then be saved or run and will become the latest configuration. This is a great way to iterate and safely grow your blast radius and magnitude of impact while keeping a history of previous runs.
Monitor scenarios in real time
The attack visualization feature is available for scenarios as well, allowing you to monitor the impact of the chaos experiments on your environment. This allows you to quickly verify the effect of your experiments and also to save the results for future reference.
Company admins can turn this feature on for the entire company by navigating to “Company Settings”, clicking on the “Settings” tab, and toggling “Attack Visualizations” on.
Results
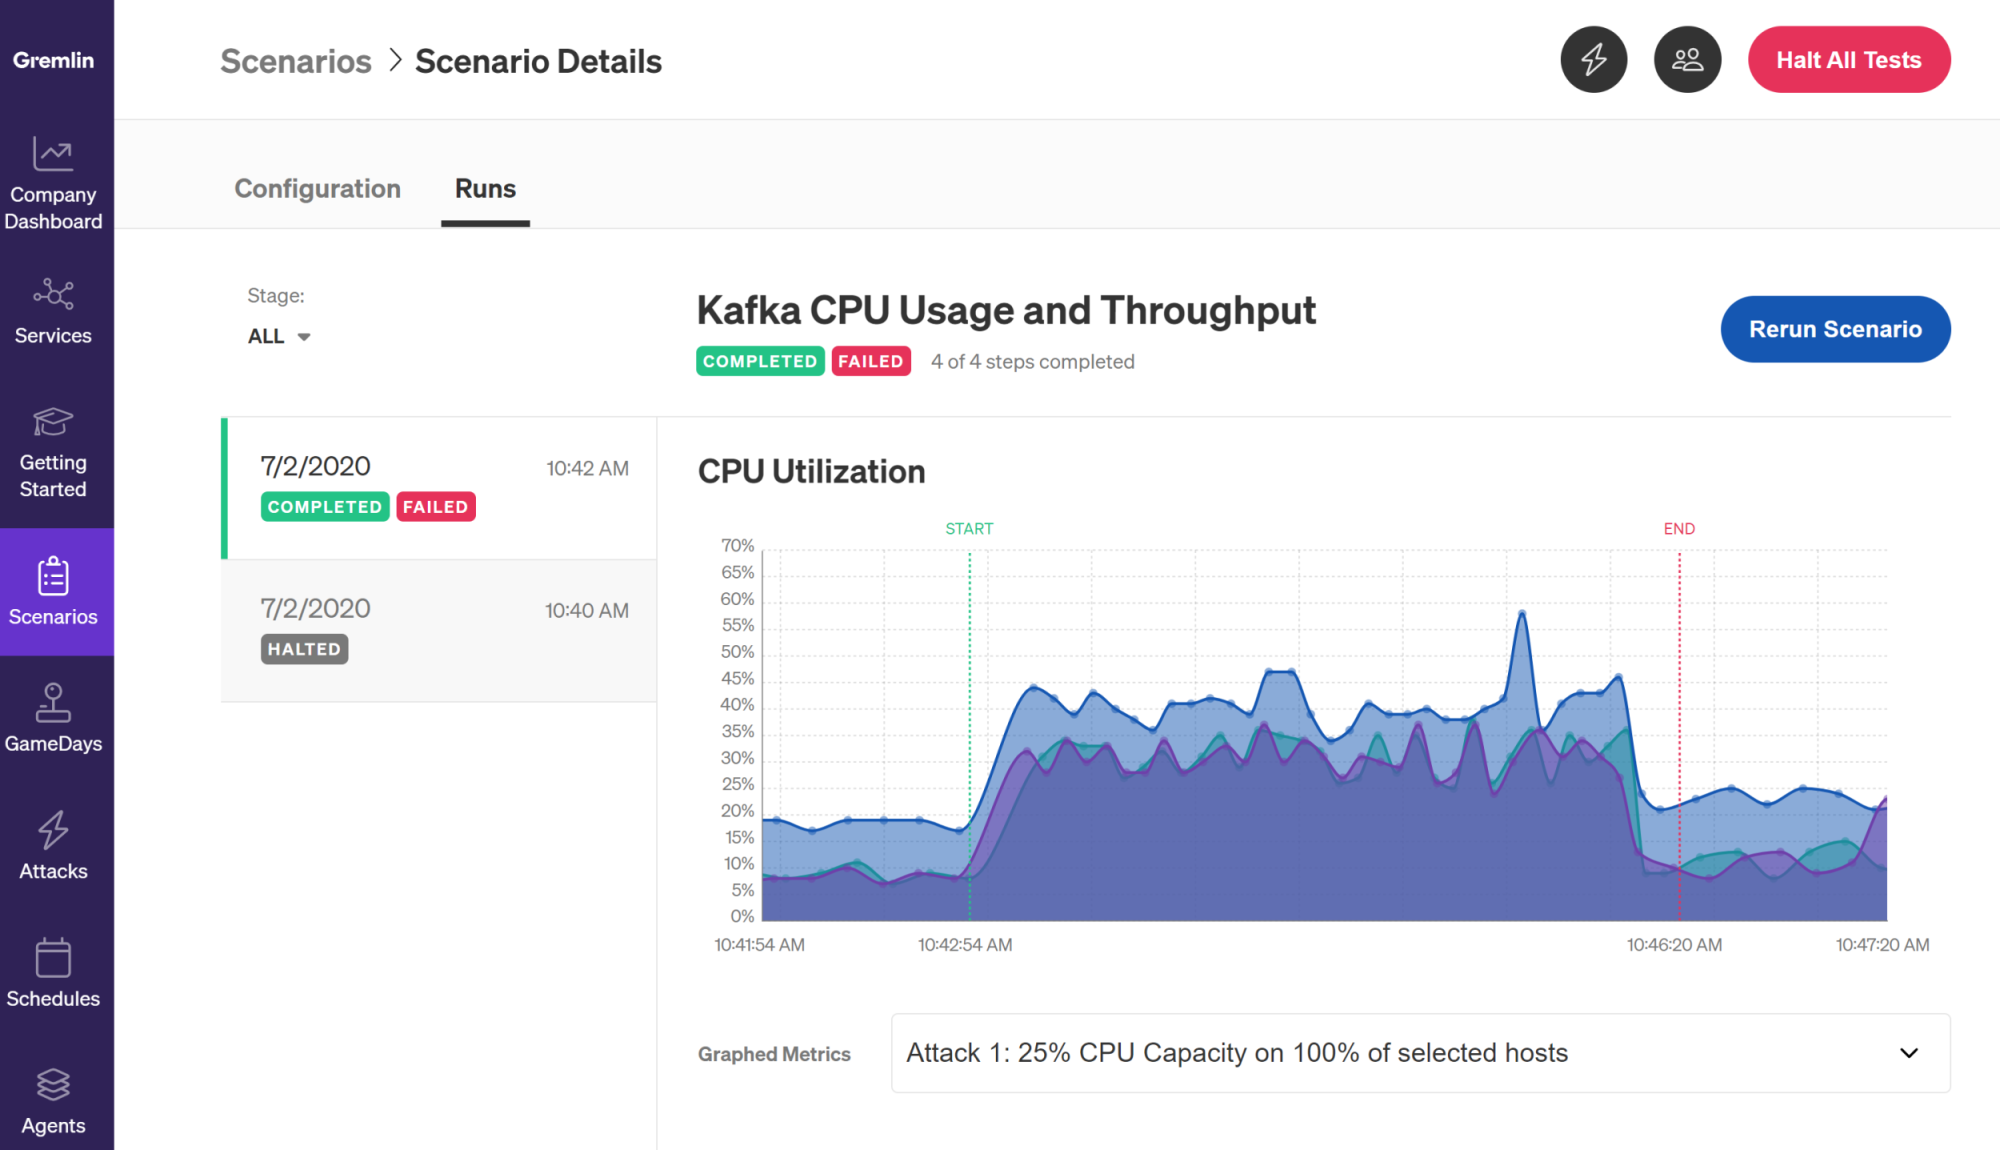
The Scenario details view shows on which day and when the Scenario has been run. For each run of a Scenario, the result of the Scenario is available. You can enter notes and observations for the Scenario run, as well as indicating with checkboxes whether the Scenario produced an expected result or if an incident was detected and/or mitigated.
History
View the history of a Scenario by opening a Scenario and clicking on the “Runs” tab to see a historical list of previous runs. Runs are listed in reverse chronological order. You can use the filter if you want to find specific results. You can also click on a previous run and hit the "Revert to this version" button to run that specific configuration.
Duplicating a Scenario
To duplicate a Scenario, open the Scenario you want to duplicate, click the overflow menu on the configuration page, and select “Duplicate”. You can also duplicate a Scenario from the Scenario list cards. Hover your cursor over the card to show the overflow menu. Click the overflow menu icon and select “Duplicate". This will create a copy of the previous Scenario. From there, the details, Status Checks, attacks, and targets can be changed. The Scenario can then be saved or run.