
Amazon RDS is a managed relational database service that lets you easily deploy, scale, and replicate databases. You can…

Andre Newman
Technical Writer
Kubernetes is a container management system which is built with reliability in mind. Architecture is commonly 1 master and 2 or more nodes which are replicated from the master. When the master dies the nodes are ready to replace it. When one node dies another will be ready to replace it.
To create a Kubernetes cluster follow our guide on "How to Use and Install Kuberenetes with Weave Net".
To install the Gremlin Kubernetes client, you will need your Gremlin Team ID and Secret Key. If you already know what those are, you can skip to step 2. If you don’t know what your Team ID and Secret Key are, you can get them from the Gremlin web app.
Visit the Teams page in Gremlin, and then click on your team’s name in the list.
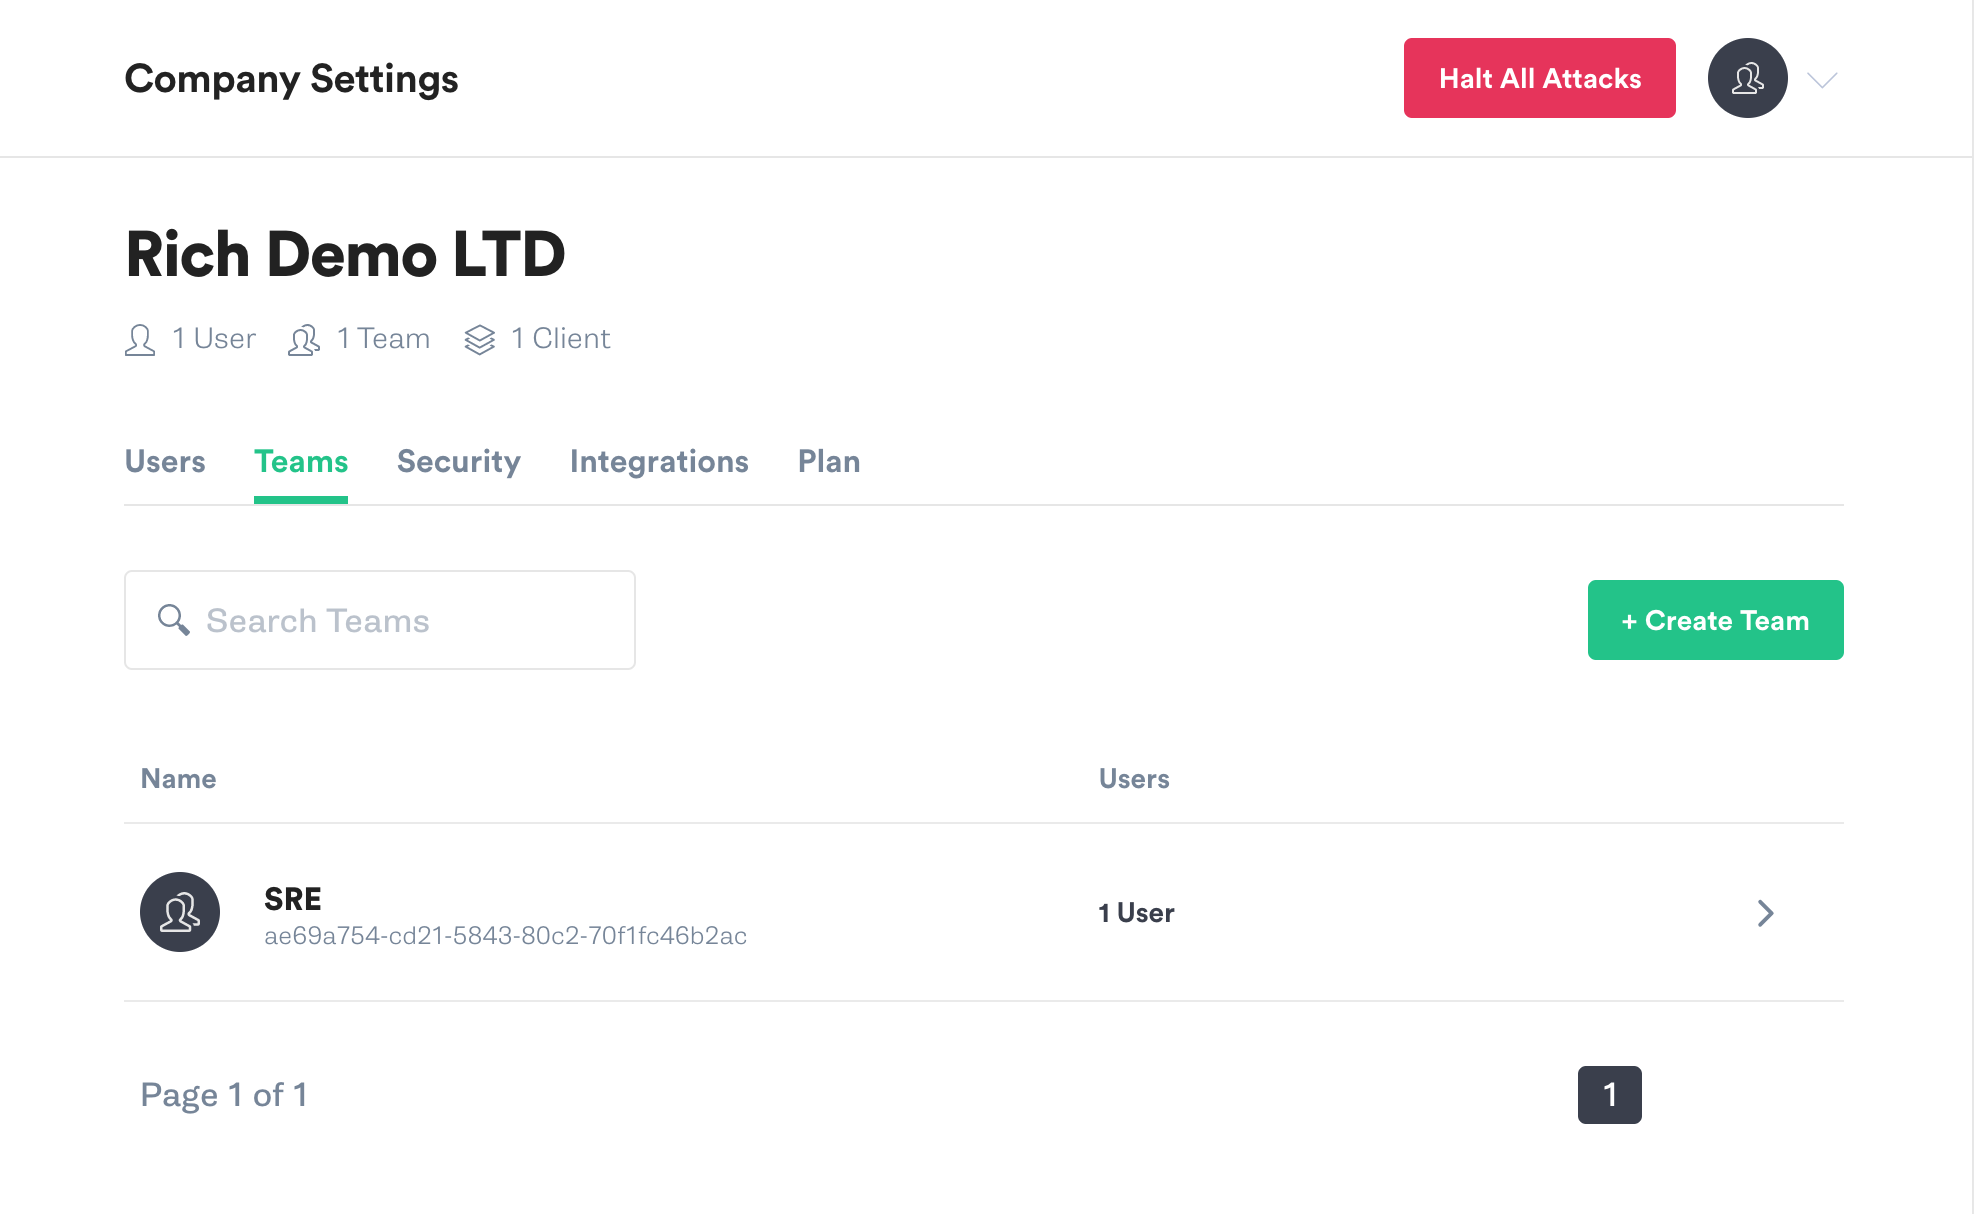
On the Teams screen click on Configuration.
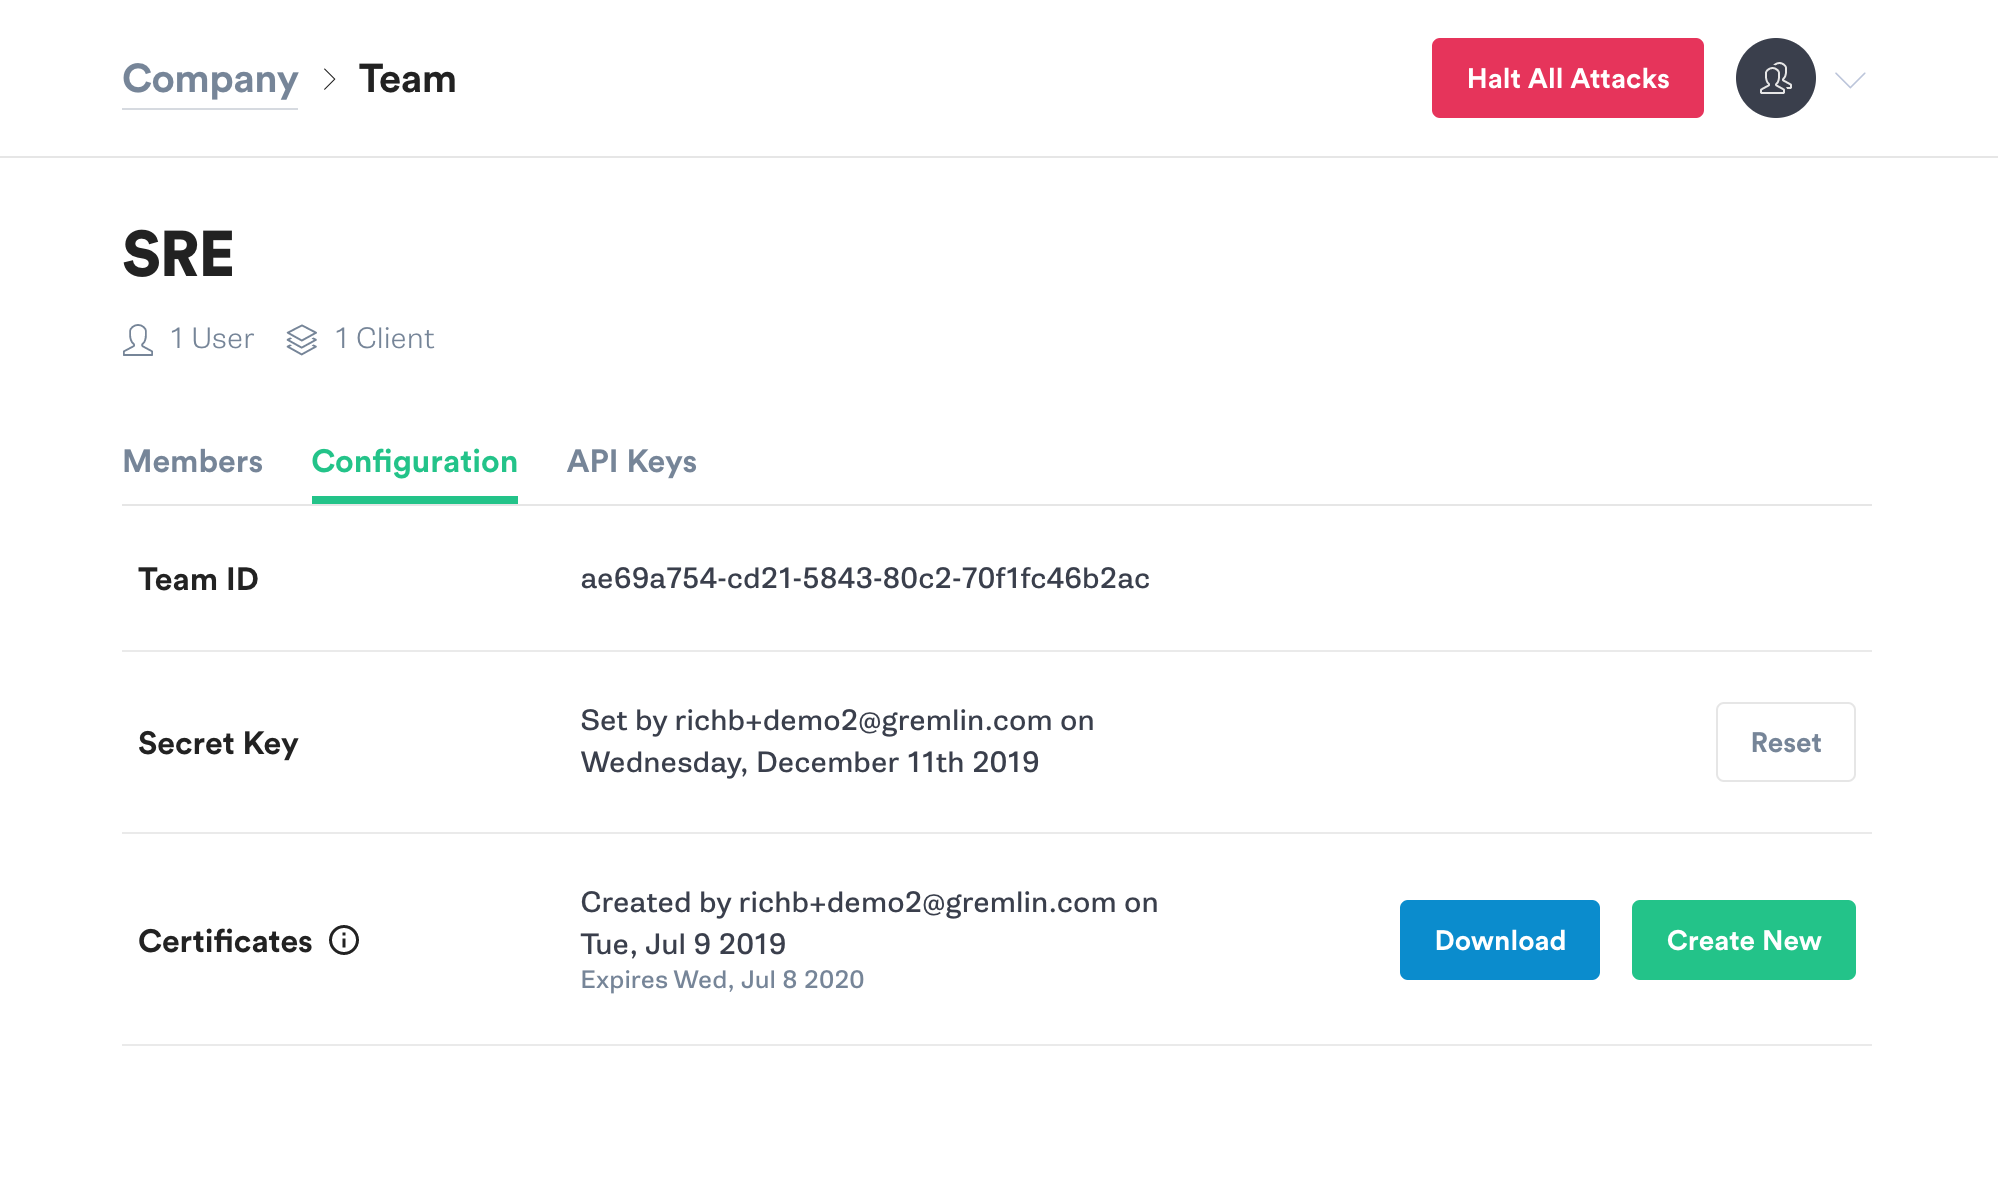
Make a note of your Team ID.
If you don’t know your Secret Key, you will need to reset it. Click the Reset button. You’ll get a popup reminding you that any running clients using the current Secret Key will need to be configured with the new key. Hit Continue.
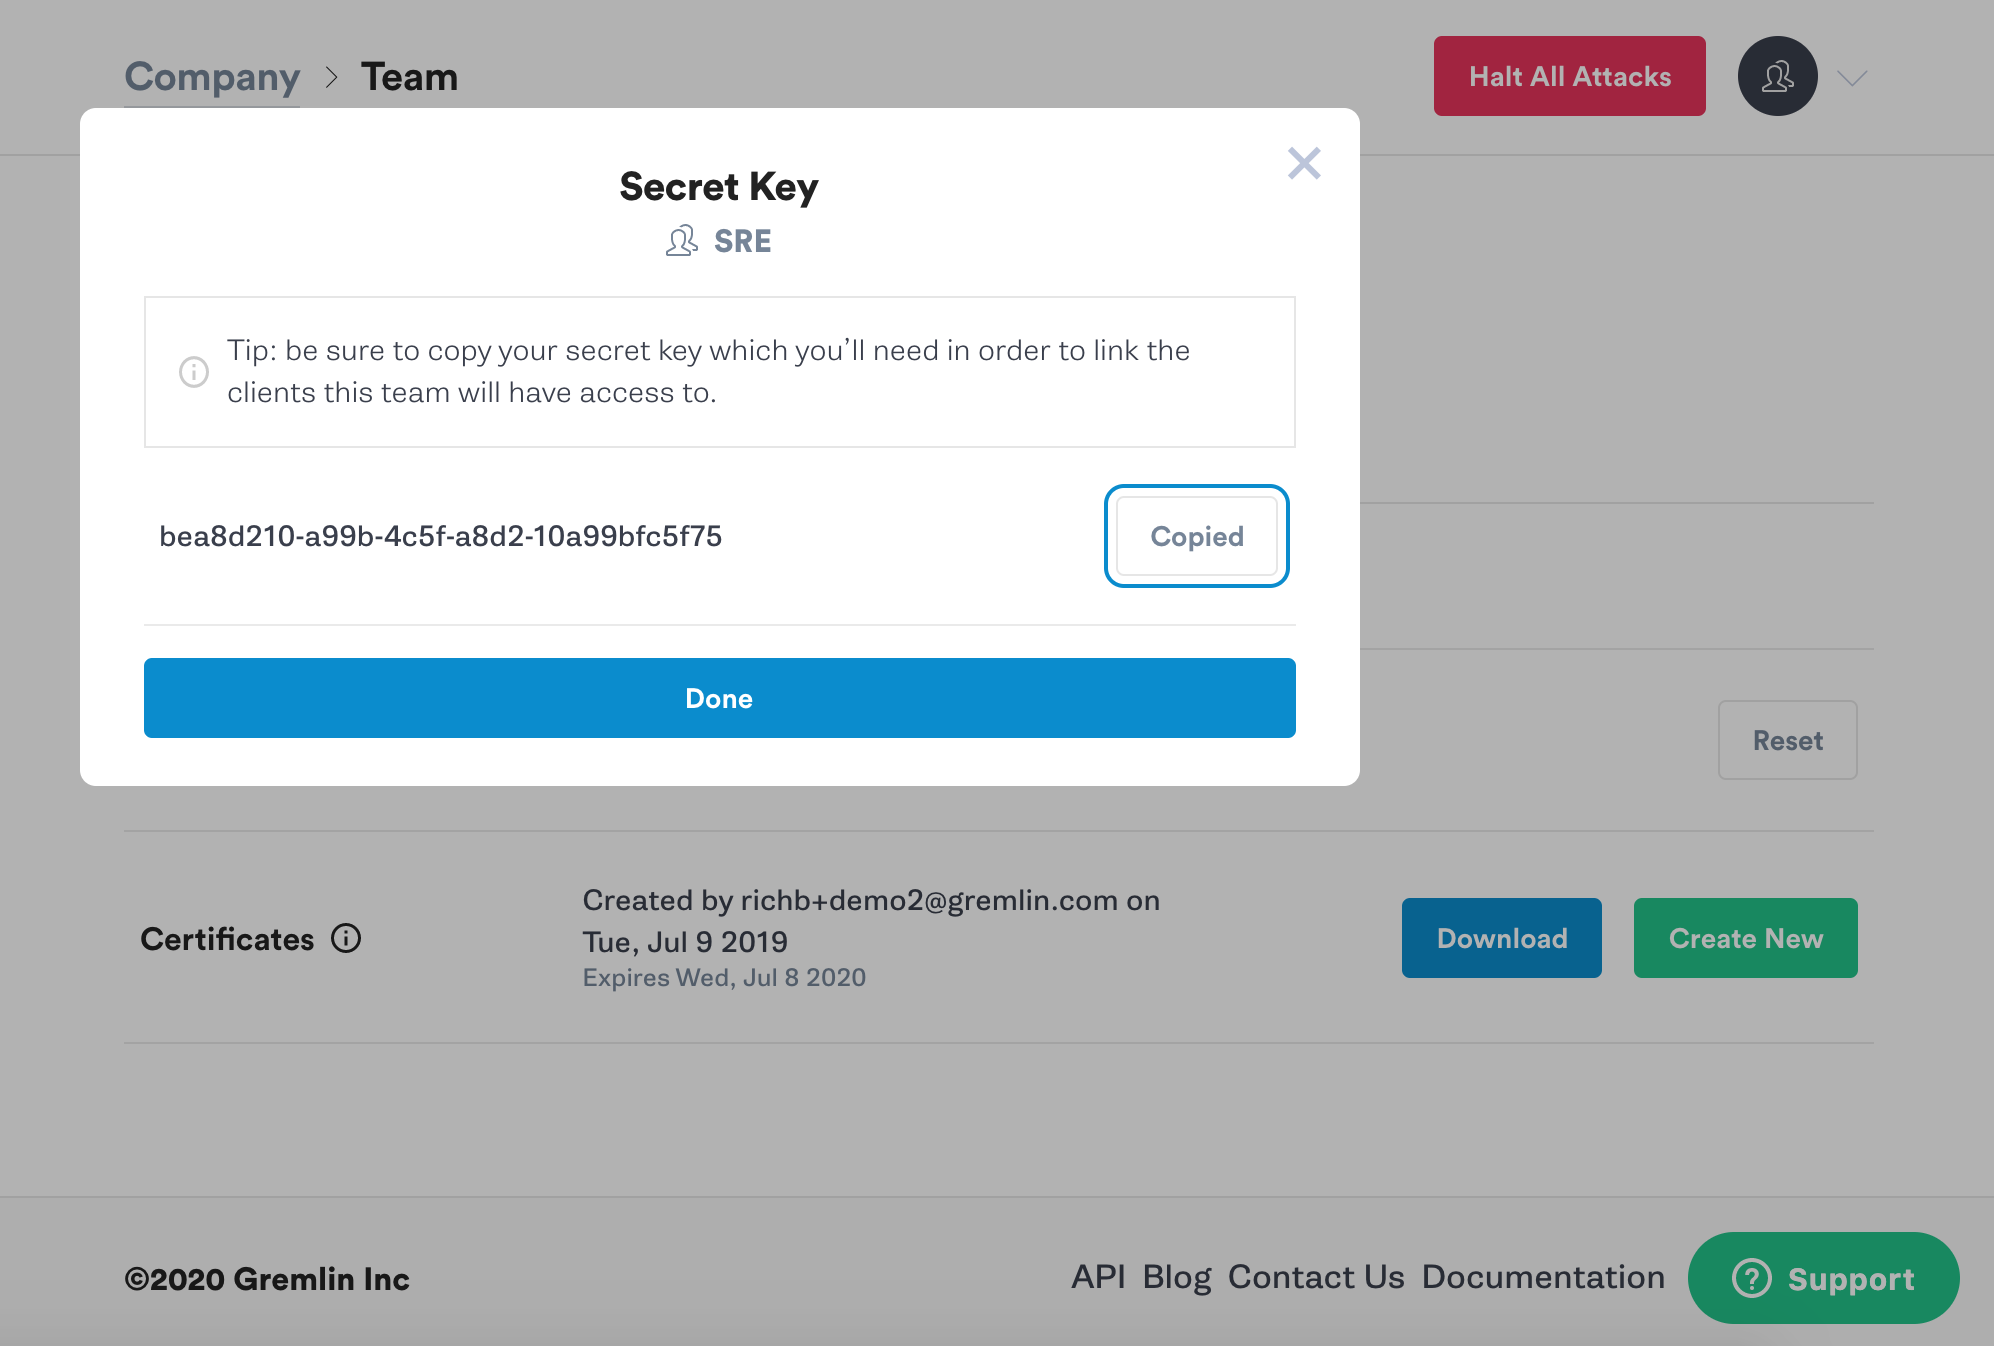
Next you’ll see a popup screen that will show you the new Secret Key. Make a note of it.
The simplest way to install the Gremlin client on your Kubernetes cluster is to use Helm.
If you would prefer to use yaml files using kubectl directly, you can find the Gremlin Kubernetes yaml files in the Gremlin Docs.
If you do not already have Helm installed, go here to get started. Once Helm is installed and configured, the next steps are to add the Gremlin repo and install the client.
Add the repo for the Gremlin Helm chart:
1helm repo add gremlin https://helm.gremlin.com
Create a namespace for the Gremlin Kubernetes client:
1kubectl create namespace gremlin
Next you will run the helm command to install the Gremlin client. In this command there are three placeholder variables that you will need to replace with real data. Replace $GREMLIN_TEAM_ID with your Team ID from step1, and replace $GREMLIN_TEAM_SECRET with your Secret Key from step 1. Replace $GREMLIN_CLUSTER_ID with a name for the cluster.
If you are using Helm v3, run this command:
1helm install gremlin gremlin/gremlin \2 --namespace gremlin \3 --set gremlin.secret.managed=true \4 --set gremlin.secret.type=secret \5 --set gremlin.secret.teamID=$GREMLIN_TEAM_ID \6 --set gremlin.secret.clusterID=$GREMLIN_CLUSTER_ID \7 --set gremlin.secret.teamSecret=$GREMLIN_TEAM_SECRET
For older versions of Helm, use the --name option:
1helm install gremlin/gremlin \2 --name gremlin \3 --namespace gremlin \4 --set gremlin.secret.managed=true \5 --set gremlin.secret.type=secret \6 --set gremlin.secret.teamID=$GREMLIN_TEAM_ID \7 --set gremlin.secret.clusterID=$GREMLIN_CLUSTER_ID \8 --set gremlin.secret.teamSecret=$GREMLIN_TEAM_SECRET
If you’re not sure which version of Helm you’re using, run this command:
1helm version
For more information on the Gremlin Helm chart, including more configuration options, check out the chart on Github.
You can use the Gremlin App or the Gremlin API to trigger Gremlin attacks. You can view the available range of Gremlin Attacks in Gremlin Help.
The “Hello World” of Chaos Engineering is the CPU Resource Attack. To create a CPU Resource Attack, select Attacks from the navigation bar on the left and click New Attack. Targeting by host should be selected by default.
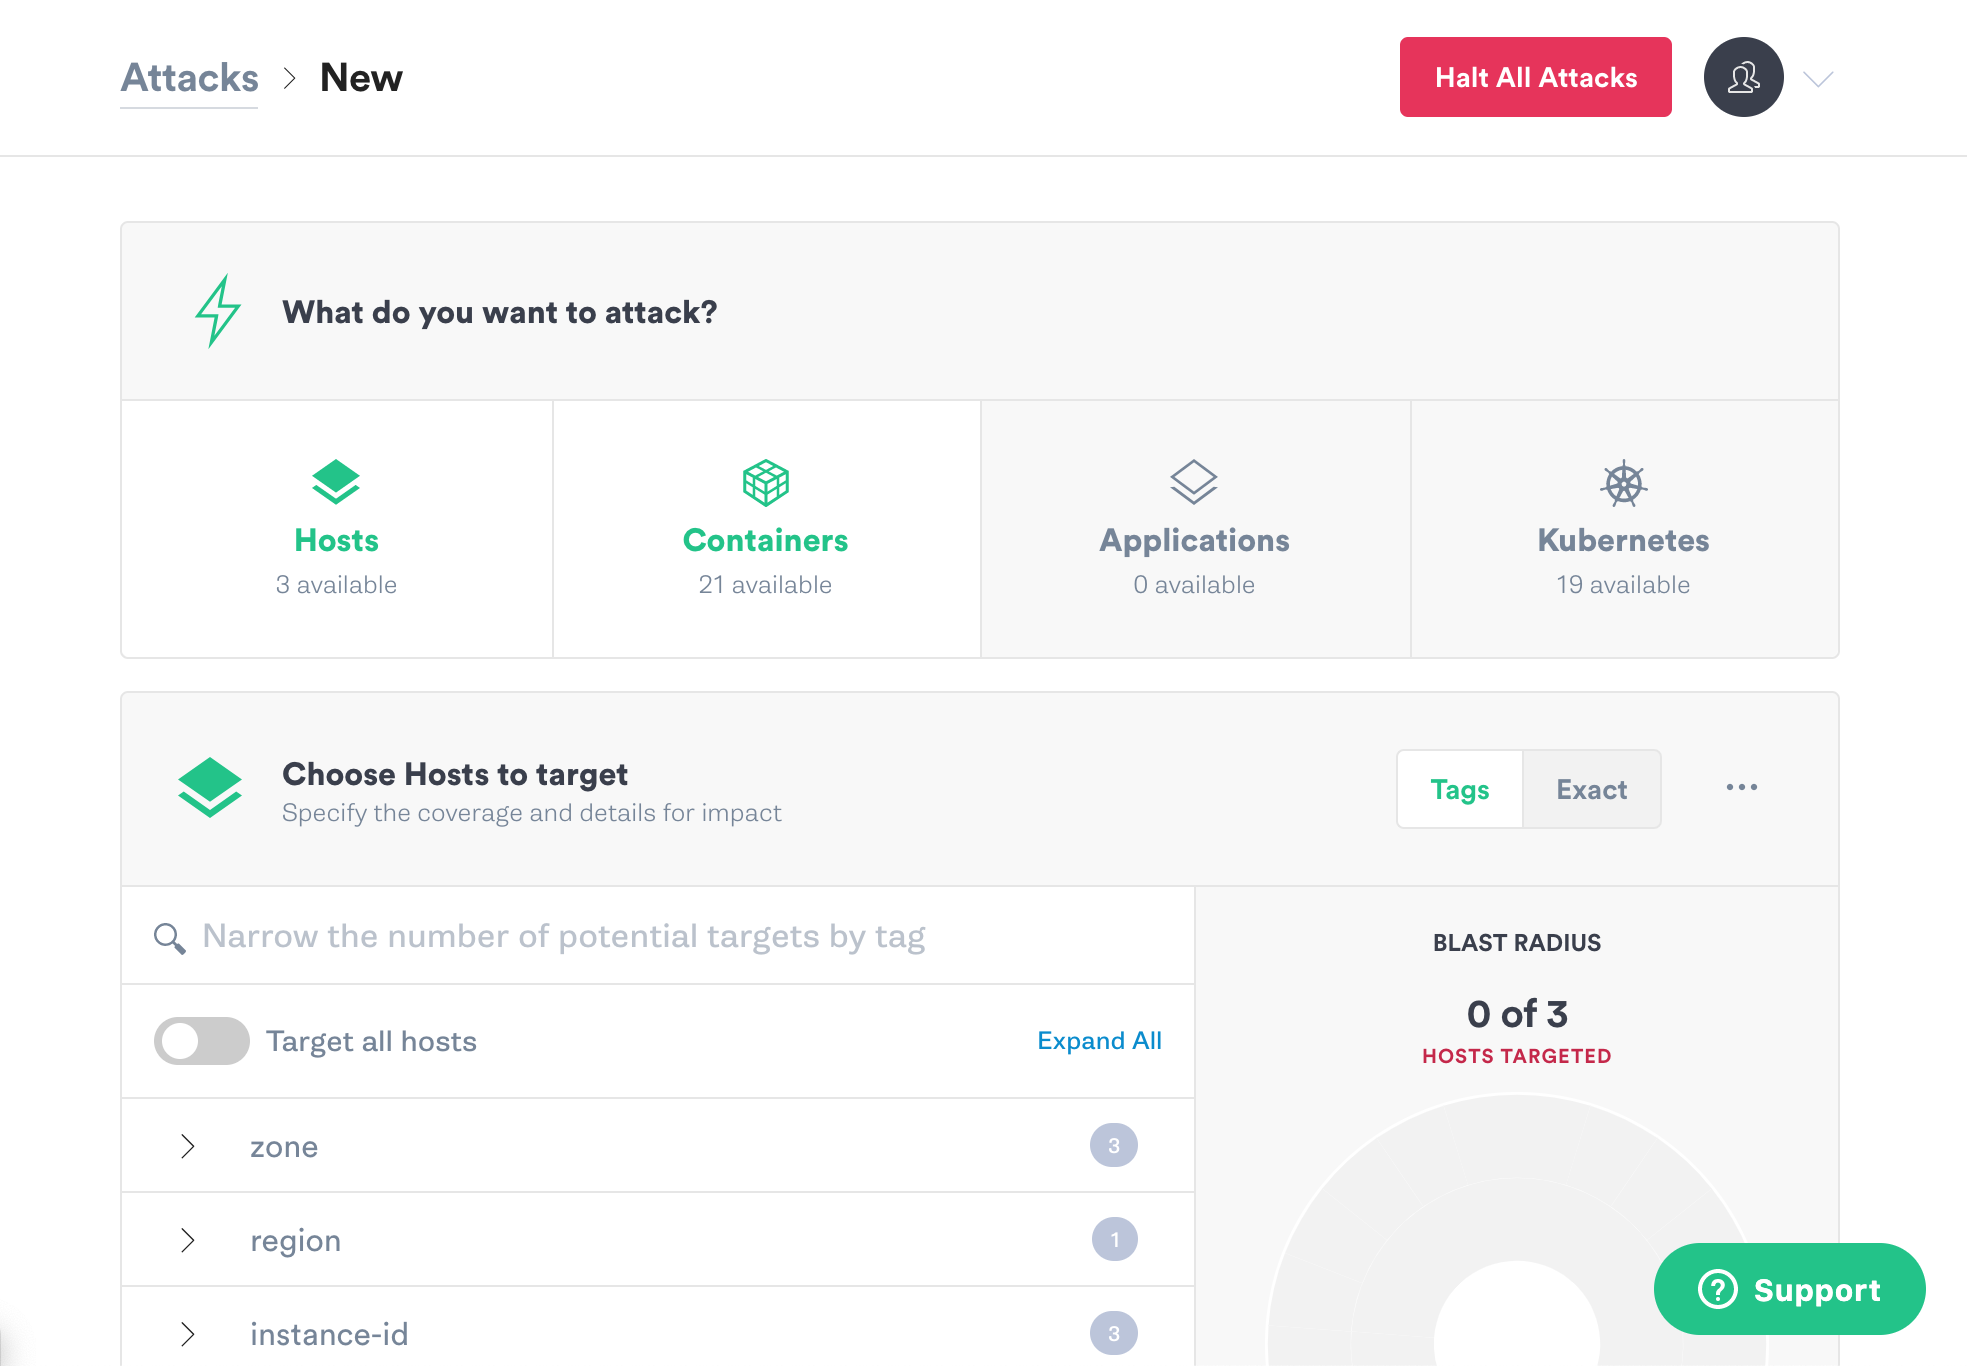
Scroll down to choose the hosts to target. We’ll start off with one host, since it’s always better to start with a smaller blast radius and increase it later. Next to “Choose Hosts to target,” click the Exact button. You’ll see a list of the hosts that you have Gremlin clients installed on. Select one of the hosts in your Kubernetes cluster. The Blast Radius graphic will change to show that one host is targeted.

Scroll down and click Choose a Gremlin. Select Resource, and CPU.

The CPU Resource Attack will consume CPU resources based on the settings you select. The most popular default settings for a CPU Resource Attack are pre-selected. A default attack will utilize 1 core for 60 seconds. Scroll down and click the Unleash Gremlin button to start the attack.
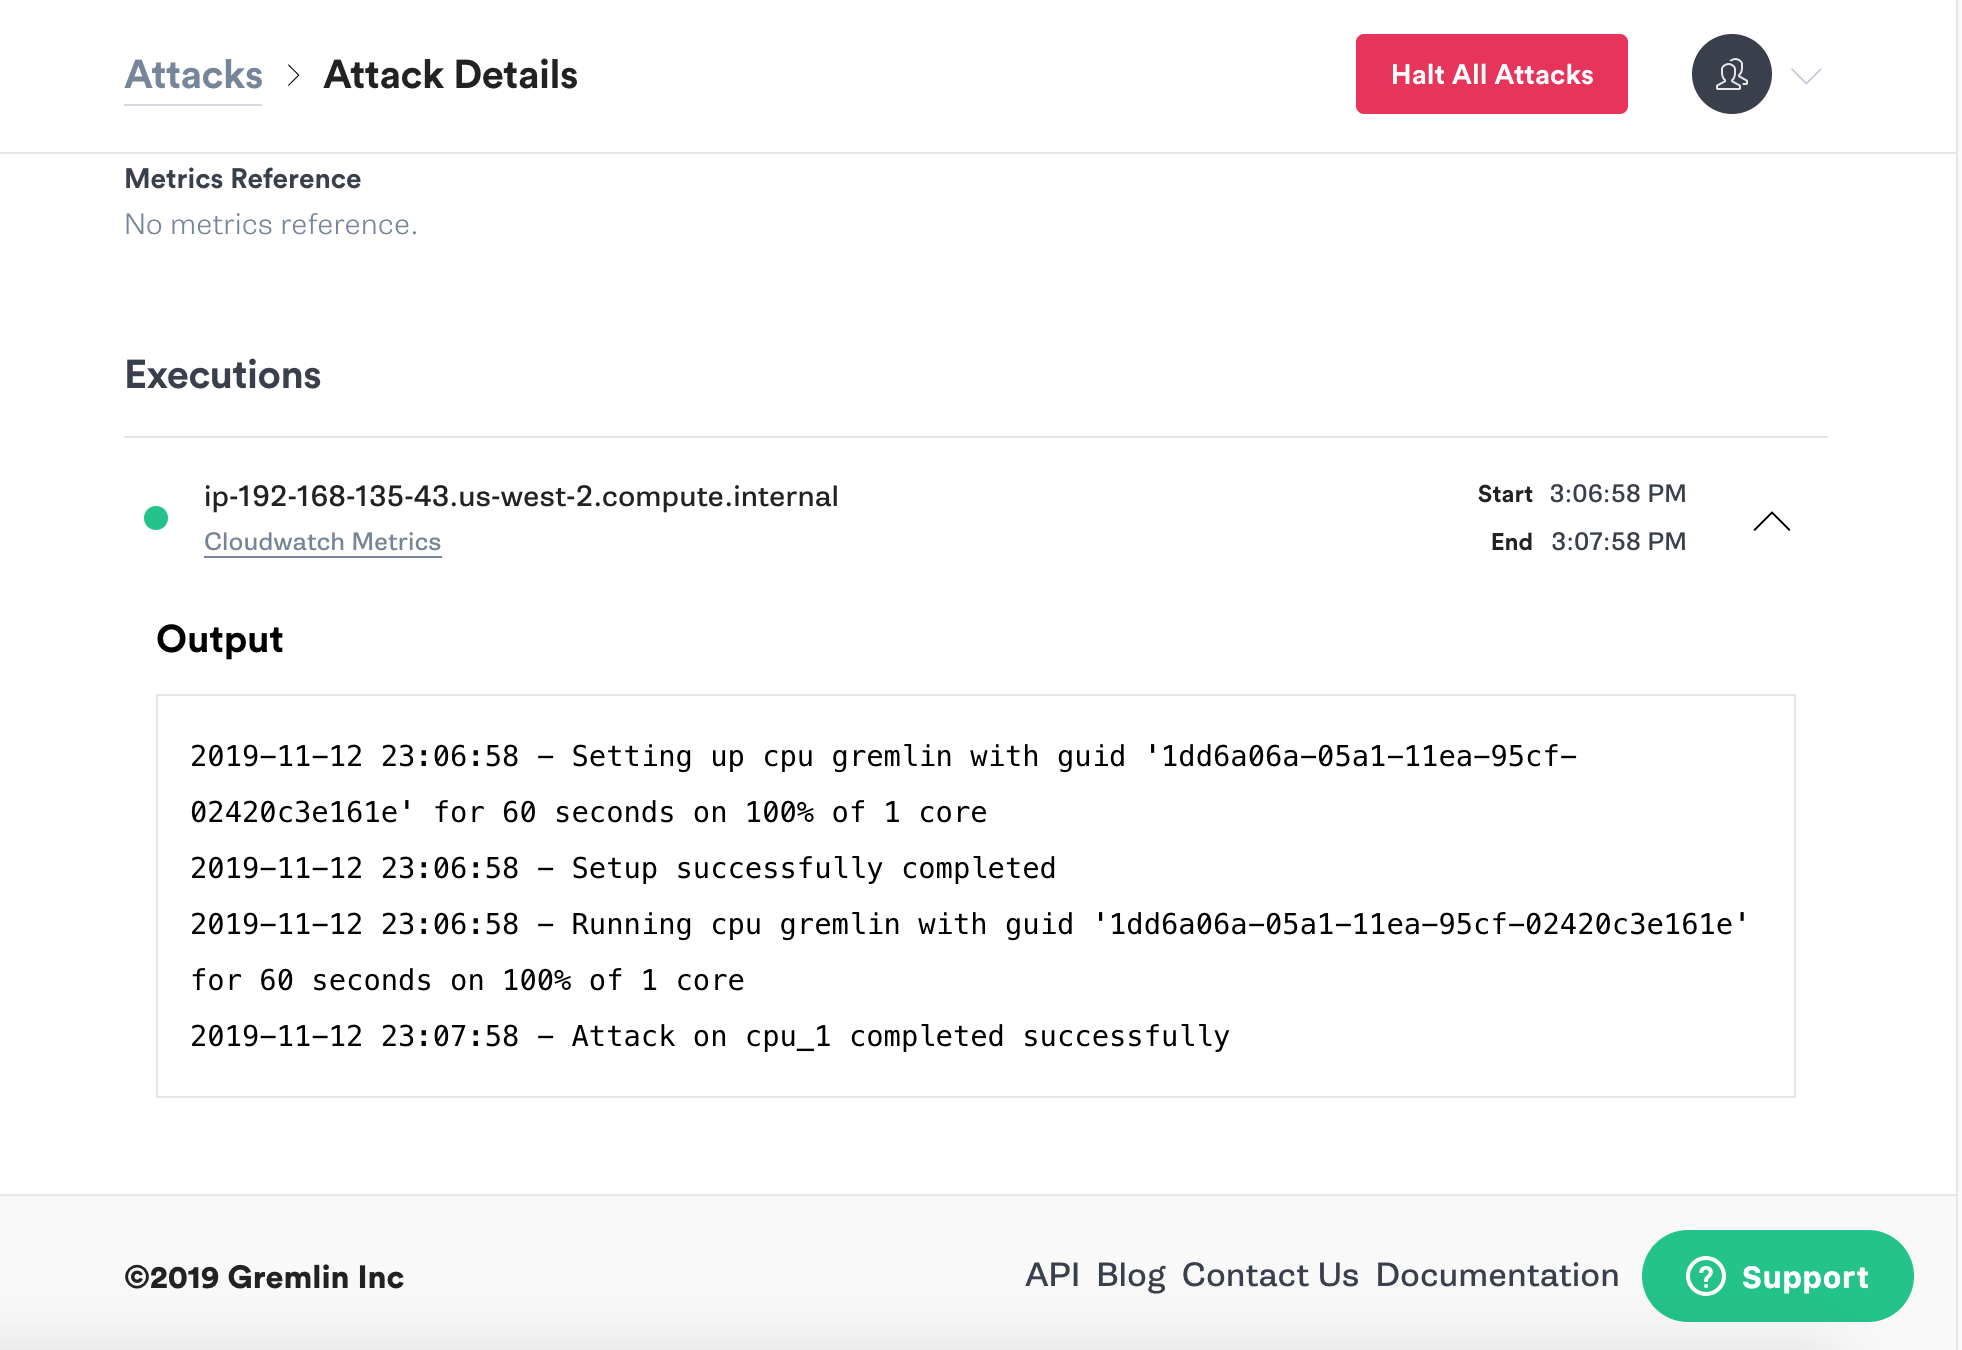
When your attack is finished it will move to Completed Attacks in the Gremlin App. To view the logs of the attack, click on the attack in the Completed Attacks list, then click the arrow to expand and view the logs.
If you’d like to clean up after you finish experimenting, the commands to uninstall are a bit different for Helm 3 and older versions. For Helm v3 run:
1helm uninstall -n gremlin gremlin
For older versions of Helm use:
1helm delete gremlin
You've installed Gremlin on a server running Kubernetes and validated that Gremlin works by running a CPU Resource attack. Next, we recommend trying Kubernetes recommended scenarios in Gremlin, which you can use to validate autoscaling or test how your cluster would handle a pod becoming unavailable.
Share your results and swap best practices with 5,000+ engineers practicing Chaos Engineering in the Chaos Engineering Slack.

Gremlin empowers you to proactively root out failure before it causes downtime. See how you can harness chaos to build resilient systems by requesting a demo of Gremlin.
Get started