
Amazon RDS is a managed relational database service that lets you easily deploy, scale, and replicate databases. You can…

Andre Newman
Technical Writer

Gremlin is a simple, safe and secure way to improve the resilience of your systems by using Chaos Engineering to identify and fix failure modes. You can use Gremlin with Docker to run chaos experiments on Docker containers, and run the Gremlin agent within a Docker container to run experiments on other containers or on the host itself.
In this tutorial, we'll show you how to do both. This tutorial will provide a walkthrough of the following:
If you want to run the Gremlin agent on a host to attack Docker containers, view the guide on How to Install and Use Gremlin with Docker on Ubuntu 18.04.
Before you begin this tutorial, you'll need the following:
In this step, you'll install Docker.
Add official Docker GPG key:
1curl -fsSL https://download.docker.com/linux/ubuntu/gpg | sudo apt-key add -
Use the following command to set up the stable repository.
1sudo add-apt-repository "deb [arch=amd64] https://download.docker.com/linux/ubuntu $(lsb_release -cs) stable"
Update the apt package index:
1sudo apt-get update
Make sure you are about to install from the Docker repo instead of the default Ubuntu 16.04 repo:
1apt-cache policy docker-ce
Install the latest version of Docker CE:
1sudo apt-get install docker-ce docker-ce-cli containerd.io
Docker should now be installed, the daemon started, and the process enabled to start on boot. Check that it is running:
1sudo systemctl status docker
When running commands in Docker, you'll need to use sudo or log in as root. To run Docker commands as a non-root user, add yourself to the Docker usergroup by running this command, replacing tammy with your username. Note that this comes with some security implications, which you can read here.
1sudo usermod -aG docker tammy
htop is an interactive process viewer for Unix. This step isn't a requirement for installing Gremlin in Docker, but we'll use htop in this tutorial to observe the impact of our attacks. You can skip this step completely, or use another monitoring tool of your choice.
First create the Dockerfile for your htop container (we use vim, but any text editor will work):
1vim Dockerfile
Add the following to the Dockerfile:
1FROM alpine:latest2RUN apk add --update htop && rm -rf /var/cache/apk/*3ENTRYPOINT ["htop"]
Build the Dockerfile and tag the image:
1sudo docker build -t htop .
Now, start an htop container. Using --pid=host grants htop access to the host's process space so that htop can monitor processes running on the host:
1sudo docker run -it --rm --pid=host htop
To exit htop, use the q key.
Next we will create an Nginx container and monitor the new container directly by joining the container pid namespace.
Nginx is a popular web server that we will use as the target of our chaos experiments. First we will create a directory for the HTML page we will serve using Nginx:
1mkdir -p ~/docker-nginx/html2cd ~/docker-nginx/html
Create a simple HTML page named index.html:
1vim index.html
Paste in the content shown below:
1<html>2 <head>3 <title>Docker nginx tutorial</title>4 <link5 rel="stylesheet"6 href="https://maxcdn.bootstrapcdn.com/bootstrap/4.0.0/css/bootstrap.min.css"7 integrity="sha384-Gn5384xqQ1aoWXA+058RXPxPg6fy4IWvTNh0E263XmFcJlSAwiGgFAW/dAiS6JXm"8 crossorigin="anonymous"9 />10 </head>11 <body>12 <div class="container">13 <h1>Hello it is your container speaking</h1>14 <p>This nginx page was created by your Docker container.</p>15 <p>Now it's time to create a Gremlin attack.</p>16 </div>17 </body>18</html>
Create a container using the Nginx Docker image (note that if you aren't a member of the docker group, you'll need to add sudo to the start of each command):
1docker run -l service=nginx --name docker-nginx -p 80:80 -d -v ~/docker-nginx/html:/usr/share/nginx/html nginx
View the docker-nginx container
1docker ps -a
You will see the following:
1CONTAINER ID IMAGE COMMAND CREATED STATUS PORTS NAMES2352609a67e95 nginx "nginx -g 'daemon off..." 33 seconds ago Up 32 seconds 0.0.0.0:80->80/tcp docker-nginx
After you have created your Gremlin account (sign up here) you will need to find your Gremlin credentials. Login to the Gremlin web app using your Company name and sign-in credentials. These were emailed to you when you signed up for Gremlin.
Navigate to Team Settings by clicking on the user icon in the top right (next to the halt button), then clicking Team Settings. Select the Configuration tab. Here, you'll see your Team ID and Secret Key. Store both of these as environment variables by running the following commands (replacing YOUR_TEAM_ID and YOUR_SECRET_KEY respectively):
1export GREMLIN_TEAM_ID=YOUR_TEAM_ID
1export GREMLIN_TEAM_SECRET=YOUR_SECRET_KEY
Gremlin uses sidecars to run attacks. By default, these have no user namespace. However, when Docker is configured to remap container users to the host, Gremlin sidecars must be launched in the host's user namespace to successfully execute attacks. To see if your Docker instance is configured to remap users, check the following:
1/etc/docker/daemon.json
To tell Gremlin to launch sidecars with the host's user namespace, create the following environment variable:
1export GREMLIN_BYPASS_USERNS_REMAP=1
Next, run the Gremlin Docker container. Use docker run to pull the official Gremlin Docker image and start the Gremlin agent:
1docker run -d --net=host \2 --cap-add=NET_ADMIN --cap-add=SYS_BOOT --cap-add=SYS_TIME \3 --cap-add=KILL \4 --pid=host \5 -v $PWD/var/lib/gremlin:/var/lib/gremlin \6 -v $PWD/var/log/gremlin:/var/log/gremlin \7 -v /var/run/docker.sock:/var/run/docker.sock \8 -e GREMLIN_TEAM_ID="$GREMLIN_TEAM_ID" \9 -e GREMLIN_TEAM_SECRET="$GREMLIN_TEAM_SECRET" \10 gremlin/gremlin daemon
If you have set GREMLIN_BYPASS_USERNS_REMAP environment variable above, you need to run the Gremlin daemon by setting that environment variable like so:
1docker run -d --net=host \2 --cap-add=NET_ADMIN --cap-add=SYS_BOOT --cap-add=SYS_TIME \3 --cap-add=KILL \4 --pid=host \5 -v $PWD/var/lib/gremlin:/var/lib/gremlin \6 -v $PWD/var/log/gremlin:/var/log/gremlin \7 -v /var/run/docker.sock:/var/run/docker.sock \8 -e GREMLIN_TEAM_ID="$GREMLIN_TEAM_ID" \9 -e GREMLIN_TEAM_SECRET="$GREMLIN_TEAM_SECRET" \10 -e GREMLIN_BYPASS_USERNS_REMAP="$GREMLIN_BYPASS_USERNS_REMAP" \11 gremlin/gremlin daemon
For additional advanced settings, please visit our Gremlin Docs: Advanced Configuration
Use docker ps to see all running Docker containers:
1docker ps
1CONTAINER ID IMAGE COMMAND CREATED STATUS PORTS NAMES2b281e749ac33 gremlin/gremlin "/entrypoint.sh daem…" 5 seconds ago Up 4 seconds relaxed_heisenberg
Now that everything's up and running, let's open an interactive shell on the Gremlin container and use the Gremlin CLI. Run the following command, replacing b281e749ac33 with the ID or name of your Gremlin container:
1docker exec -it b281e749ac33 /bin/sh
From within the container, check out the available attack types:
1gremlin help attack-container
1Usage: gremlin attack-container CONTAINER TYPE [type-specific-options]2Type "gremlin help attack-container TYPE" for more details:34 blackhole # An attack which drops all matching network traffic5 cpu # An attack which consumes CPU resources6 io # An attack which consumes IO resources7 latency # An attack which adds latency to all matching network traffic8 memory # An attack which consumes memory9 packet_loss # An attack which introduces packet loss to all matching network traffic10 shutdown # An attack which forces the target to shutdown11 dns # An attack which blocks access to DNS servers12 time_travel # An attack which changes the system time.13 disk # An attack which consumes disk resources14 process_killer # An attack which kills the specified process
Exit the container:
1exit
We will use the Gremlin CLI attack command to create a CPU attack. This attack will consume CPU using the default settings of 1 core for 60 seconds.
We could use our running Gremlin container to run the attack, but for this example, we'll actually create a new container that will stop once the attack is finished. Run the following to create the CPU attack:
1docker run -d \2 --net=host \3 --pid=host \4 --cap-add=NET_ADMIN \5 --cap-add=SYS_BOOT \6 --cap-add=SYS_TIME \7 --cap-add=KILL \8 -e GREMLIN_TEAM_ID="${GREMLIN_TEAM_ID}" \9 -e GREMLIN_TEAM_SECRET="${GREMLIN_TEAM_SECRET}" \10 -v /var/run/docker.sock:/var/run/docker.sock \11 -v /var/log/gremlin:/var/log/gremlin \12 -v /var/lib/gremlin:/var/lib/gremlin \13 gremlin/gremlin attack cpu
View the progress of the attack using the htop container you created earlier:
1docker run -it --rm --pid=host htop
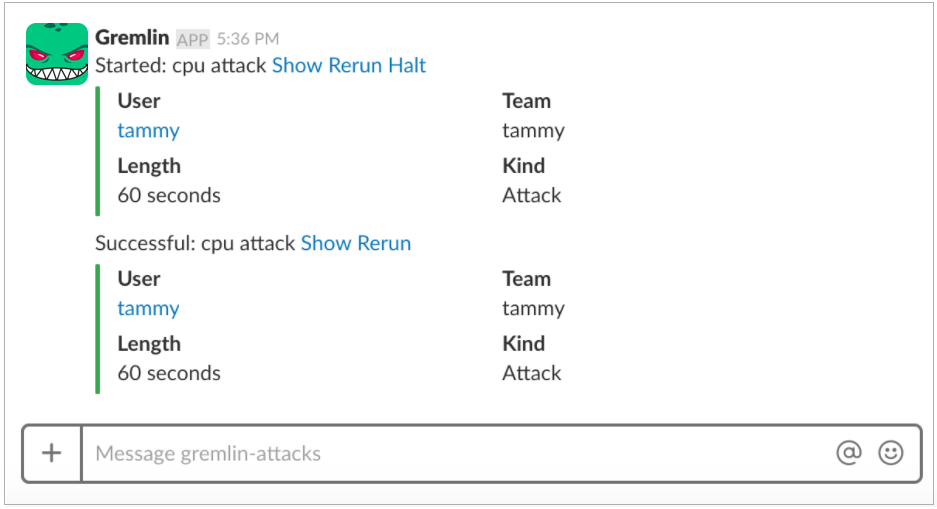
If you have setup the Gremlin Slack integration, it will also notify your team via Slack:
Gremlin has an attack-container argument that can be used to attack containers by their container ID or name. We will use the Gremlin CLI attack-container argument to create a CPU attack. This attack will consume CPU using the default settings of 1 core for 60 seconds.
Before the attack use htop to monitor the docker-nginx container, replace f291a040a6aa with your Nginx container ID:
1docker run -it --rm --pid=container:f291a040a6aa htop
You will see the following:
11 [ 0.0%] Tasks: 3, 0 thr; 1 running22 [| 0.7%] Load average: 0.72 0.41 0.213Mem[||||||||||||||||||||||||| 141M/3.86G] Uptime: 00:30:344Swp[ 0K/0K]56PID USER PRI NI VIRT RES SHR S CPU% MEM% TIME+ Command7 47 root 20 0 4488 2236 932 R 0.0 0.1 0:00.07 htop8 1 root 20 0 32428 5180 4504 S 0.0 0.1 0:00.03 nginx: master process nginx -g daemon off;9 8 101 20 0 32900 2476 1448 S 0.0 0.1 0:00.00 nginx: worker process
Run the following to create the CPU container attack against a container. Replacef291a040a6aa with your container ID:
1docker run -d -it \2 --cap-add=NET_ADMIN \3 -e GREMLIN_TEAM_ID="${GREMLIN_TEAM_ID}" \4 -e GREMLIN_TEAM_SECRET="${GREMLIN_TEAM_SECRET}" \5 -v /var/run/docker.sock:/var/run/docker.sock \6 gremlin/gremlin attack-container f291a040a6aa cpu
View the progress of the attack using the htop container you created earlier:
1docker run -it --rm --pid=container:f291a040a6aa htop
You will see the following result:
11 [| 0.7%] Tasks: 4, 1 thr; 2 running22 [||||||||||||||||||||||||||||||||||||||||||||||||||||||||||||||||| 100.0%] Load average: 0.30 0.33 0.193Mem[||||||||||||||||||||||||| 163M/3.86G] Uptime: 00:32:094Swp[ 0K/0K]56PID USER PRI NI VIRT RES SHR S CPU% MEM% TIME+ Command7 51 root 20 0 15456 13696 4112 S 99.0 0.3 0:11.25 gremlin attack cpu8 70 root 20 0 4488 1988 948 R 0.0 0.0 0:00.04 htop9 1 root 20 0 32428 5180 4504 S 0.0 0.1 0:00.03 nginx: master process nginx -g daemon off;10 8 101 20 0 32900 2476 1448 S 0.0 0.1 0:00.00 nginx: worker process
After 60 seconds, the attack will automatically halt and CPU usage will drop to normal.
Next, we'll run a blackhole attack on the Nginx container. A blackhole attack drops all network traffic to and from a container, making it appear offline. First, run the attack (make sure to replace the container ID!):
1docker run -it \2 --cap-add=NET_ADMIN \3 -e GREMLIN_TEAM_ID="${GREMLIN_TEAM_ID}" \4 -e GREMLIN_TEAM_SECRET="${GREMLIN_TEAM_SECRET}" \5 -v /var/run/docker.sock:/var/run/docker.sock \6 gremlin/gremlin attack-container f291a040a6aa blackhole --ingress_port 80
Now, if you try to access the Nginx page, the request will time out:
1curl localhost
You can view the progress of the attack using the htop container you created earlier:
1sudo docker run -d -it --rm --pid=container:f291a040a6aa htop
You will see the following result:
1Attacking container 'f291a040a6aa' with command ["attack", "blackhole", "-h", "google.com"] ...2Spawning sidecar container 'gremlin-f291a040a6aa' based on 'gremlin/gremlin:latest' for attack ...3Setting up blackhole gremlin with guid '0df1ccf5-0801-11e8-9acf-0242fe3ba0bc' for 60 seconds4Setup successfully completed5Running blackhole gremlin with guid '0df1ccf5-0801-11e8-9acf-0242fe3ba0bc' for 60 seconds6Dropping all egress traffic (to local port(s) 80)7Dropping all ingress traffic (from local port(s) 80)8Reverting impact!
Now that the Gremlin container is running in your Docker environment, you can use the Gremlin web app to run attacks on the host, or other Docker containers running on the host.
To start an attack from the web app, log in using your Gremlin credentials and select Attacks from the left panel. Then, select New Attack to get the following screen:

If you have multiple targets, you can target multiple targets for the attack by using tags or by finding the exact target. For our example, we'll use Exact:

Next we'll select an attack to run against the container. Like our CLI example, we'll use the CPU attack. For more information about all our attacks, please visit Attacks.

Once the attacks begins, you'll be taken to the following screen. You can follow the progress of attack from this page. The Stage under Details will state the current progress of the attack. If for some reason you need to stop the attack, the Halt button will stop the attack.

You've installed Gremlin in a Docker container and validated that Gremlin works by running the "Hello, World!" of Chaos Engineering experiments: the CPU resource attack. You have run a CPU resource attack from the Gremlin Docker container against the host. You have also run a CPU resource attack and blackhole attack from the Gremlin Docker container against an Nginx Docker container. You now possess tools that make it possible for you to explore additional Gremlin Attacks including attacks that impact State and Network.
The Gremlin documentation is a great resource and reference for using Gremlin to do Chaos Engineering. You can also explore the Gremlin Community for more tutorials, information on how to use Chaos Engineering with your application infrastructure, and advice from other Chaos Engineers on how to make your systems more reliable.


Gremlin empowers you to proactively root out failure before it causes downtime. See how you can harness chaos to build resilient systems by requesting a demo of Gremlin.
Get started