
Amazon RDS is a managed relational database service that lets you easily deploy, scale, and replicate databases. You can…

Andre Newman
Technical Writer
This tutorial explains how to install and use Gremlin locally with Kubernetes. You will run a Chaos Engineering experiment using Gremlin to inject packet loss to a Kubernetes pod running the frontend of a microservices e-commerce store.
Before you begin this tutorial, you'll need the following:
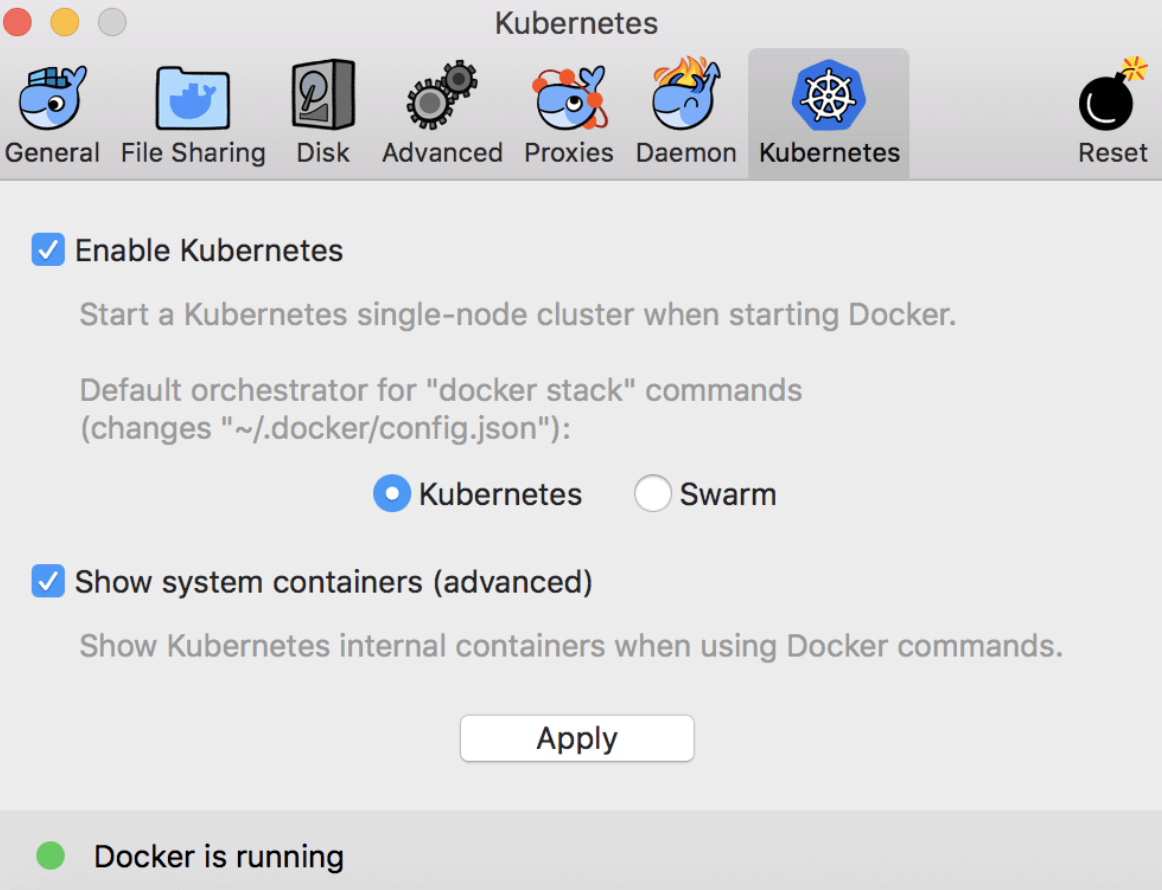
First you will need to install Docker For Mac if you do not yet have it on your local computer, follow the instructions provided by Docker. Next enable Kubernetes, by clicking Enable Kubernetes and Show system containers (advanced). Then click apply:
Run the following command:
1kubectl cluster-info
You will see the following output:
1Kubernetes master is running at https://localhost:644323KubeDNS is running at https://localhost:6443/api/v1/namespaces/kube-system/services/kube-dns:dns/proxy
Next create a folder on your Desktop to store files you will need for Kubernetes and Gremlin authentication.
1cd Desktop2mkdir gremlin3cd gremlin
Weave Net is a virtual network that helps simplify container networking and provides automatic service discovery. Install Weave Net by running:
1kubectl apply -f "https://cloud.weave.works/k8s/net?k8s-version=$(kubectl version | base64 | tr -d '\n')"
You will see the following result:
1serviceaccount "weave-net" created2clusterrole "weave-net" created3clusterrolebinding "weave-net" created4role "weave-net" created5rolebinding "weave-net" created6daemonset "weave-net" created
It may take a minute or two for DNS to be ready, run the following command to check for DNS to be ready:
1kubectl get pods --all-namespaces
The successful result will look like this, every container should be running:
1NAMESPACE NAME READY STATUS RESTARTS AGE2kube-system etcd-kube-01 1/1 Running 0 5m3kube-system kube-apiserver-kube-01 1/1 Running 0 6m4kube-system kube-controller-manager-kube-01 1/1 Running 0 5m5kube-system kube-dns-6f4fd4bdf-whbhd 3/3 Running 0 6m6kube-system kube-proxy-2hdhk 1/1 Running 0 6m7kube-system kube-proxy-tvhjk 1/1 Running 0 5m8kube-system kube-proxy-wspmv 1/1 Running 0 5m9kube-system kube-scheduler-kube-01 1/1 Running 0 6m10kube-system weave-net-9ghn5 2/2 Running 1 5m11kube-system weave-net-lh8tq 2/2 Running 0 5m12kube-system weave-net-qhr25 2/2 Running 0
Congratulations, now your Kubernetes cluster running on Ubuntu 16.04 is up and ready for you to deploy a microservices application.
First you will need to download the Weaveworks Microservices Sock Shop demo app to your Gremlin folder, run the following command:
1git clone https://github.com/microservices-demo/microservices-demo.git
Create a namespace for your Sock Shop demo app:
1kubectl create namespace sock-shop
You will see the following result:
1namespace "sock-shop" created
Navigate to the microservices-demo/deploy/kubernetes folder:
1cd microservices-demo/deploy/kubernetes
Next apply the demo to your kubernetes cluster:
1kubectl apply -f complete-demo.yaml
Check to confirm that all the Sock Shop pods are now running:
1kubectl get pods --namespace sock-shop
You will see the following result when all pods are ready, they will have the status of “Running”:
1NAMESPACE NAME READY STATUS RESTARTS AGEdefault carts-db-784446fdd6-kp7sm 1/1 Running 0 1mdefault gremlin-8xbnm 1/1 Running 0 1mdocker compose-74649b4db6-xdkwf 1/1 Running 0 1mdocker compose-api-6ff6b7fb4f-g29km 1/1 Running 0 1mkube-system etcd-docker-for-desktop 1/1 Running 2 1mkube-system kube-apiserver-docker-for-desktop 1/1 Running 2 1mkube-system kube-controller-manager-docker-for-desktop 1/1 Running 2 1mkube-system kube-dns-86f4d74b45-4n8b6 3/3 Running 3 1mkube-system kube-proxy-dsqqf 1/1 Running 1 1mkube-system kube-scheduler-docker-for-desktop 1/1 Running 2 1mkube-system weave-net-wsbk9 2/2 Running 3 1msock-shop carts-6cd457d86c-x6vjs 1/1 Running 0 1msock-shop carts-db-784446fdd6-dxkvx 1/1 Running 0 1msock-shop catalogue-779cd58f9b-hk4vr 1/1 Running 0 1msock-shop catalogue-db-6794f65f5d-7bzr4 1/1 Running 0 1msock-shop front-end-679d7bcb77-m2995 1/1 Running 0 1msock-shop orders-755bd9f786-w46z4 1/1 Running 0 1msock-shop orders-db-84bb8f48d6-nfzlq 1/1 Running 0 1msock-shop payment-674658f686-6br5w 1/1 Running 0 1msock-shop queue-master-5f98bbd67-gfhxx 1/1 Running 0 1msock-shop rabbitmq-86d44dd846-sqt7f 1/1 Running 0 1msock-shop shipping-79786fb956-z8xxg 1/1 Running 0 1msock-shop user-6995984547-lk9dg 1/1 Running 0 1msock-shop user-db-fc7b47fb9-xsqzw 1/1 Running 0 1m
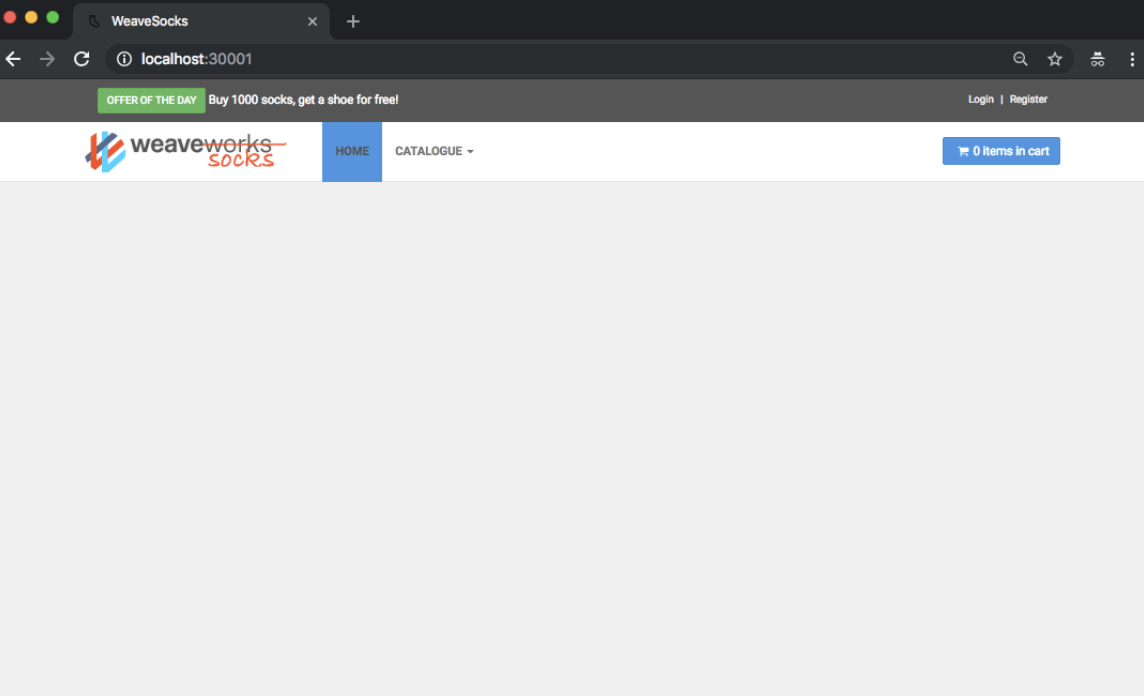
Visit http://localhost:30001/ to see the Sock Shop running:

Step 6.1 - Retrieve Your Team ID and Secret Key
To install the Gremlin agent and Kubernetes client, you will need your Gremlin Team ID and Secret Key. If you already know what those are, you can skip to step 3.2. If you don’t know what your Team ID and Secret Key are, you can get them from the Gremlin web app.
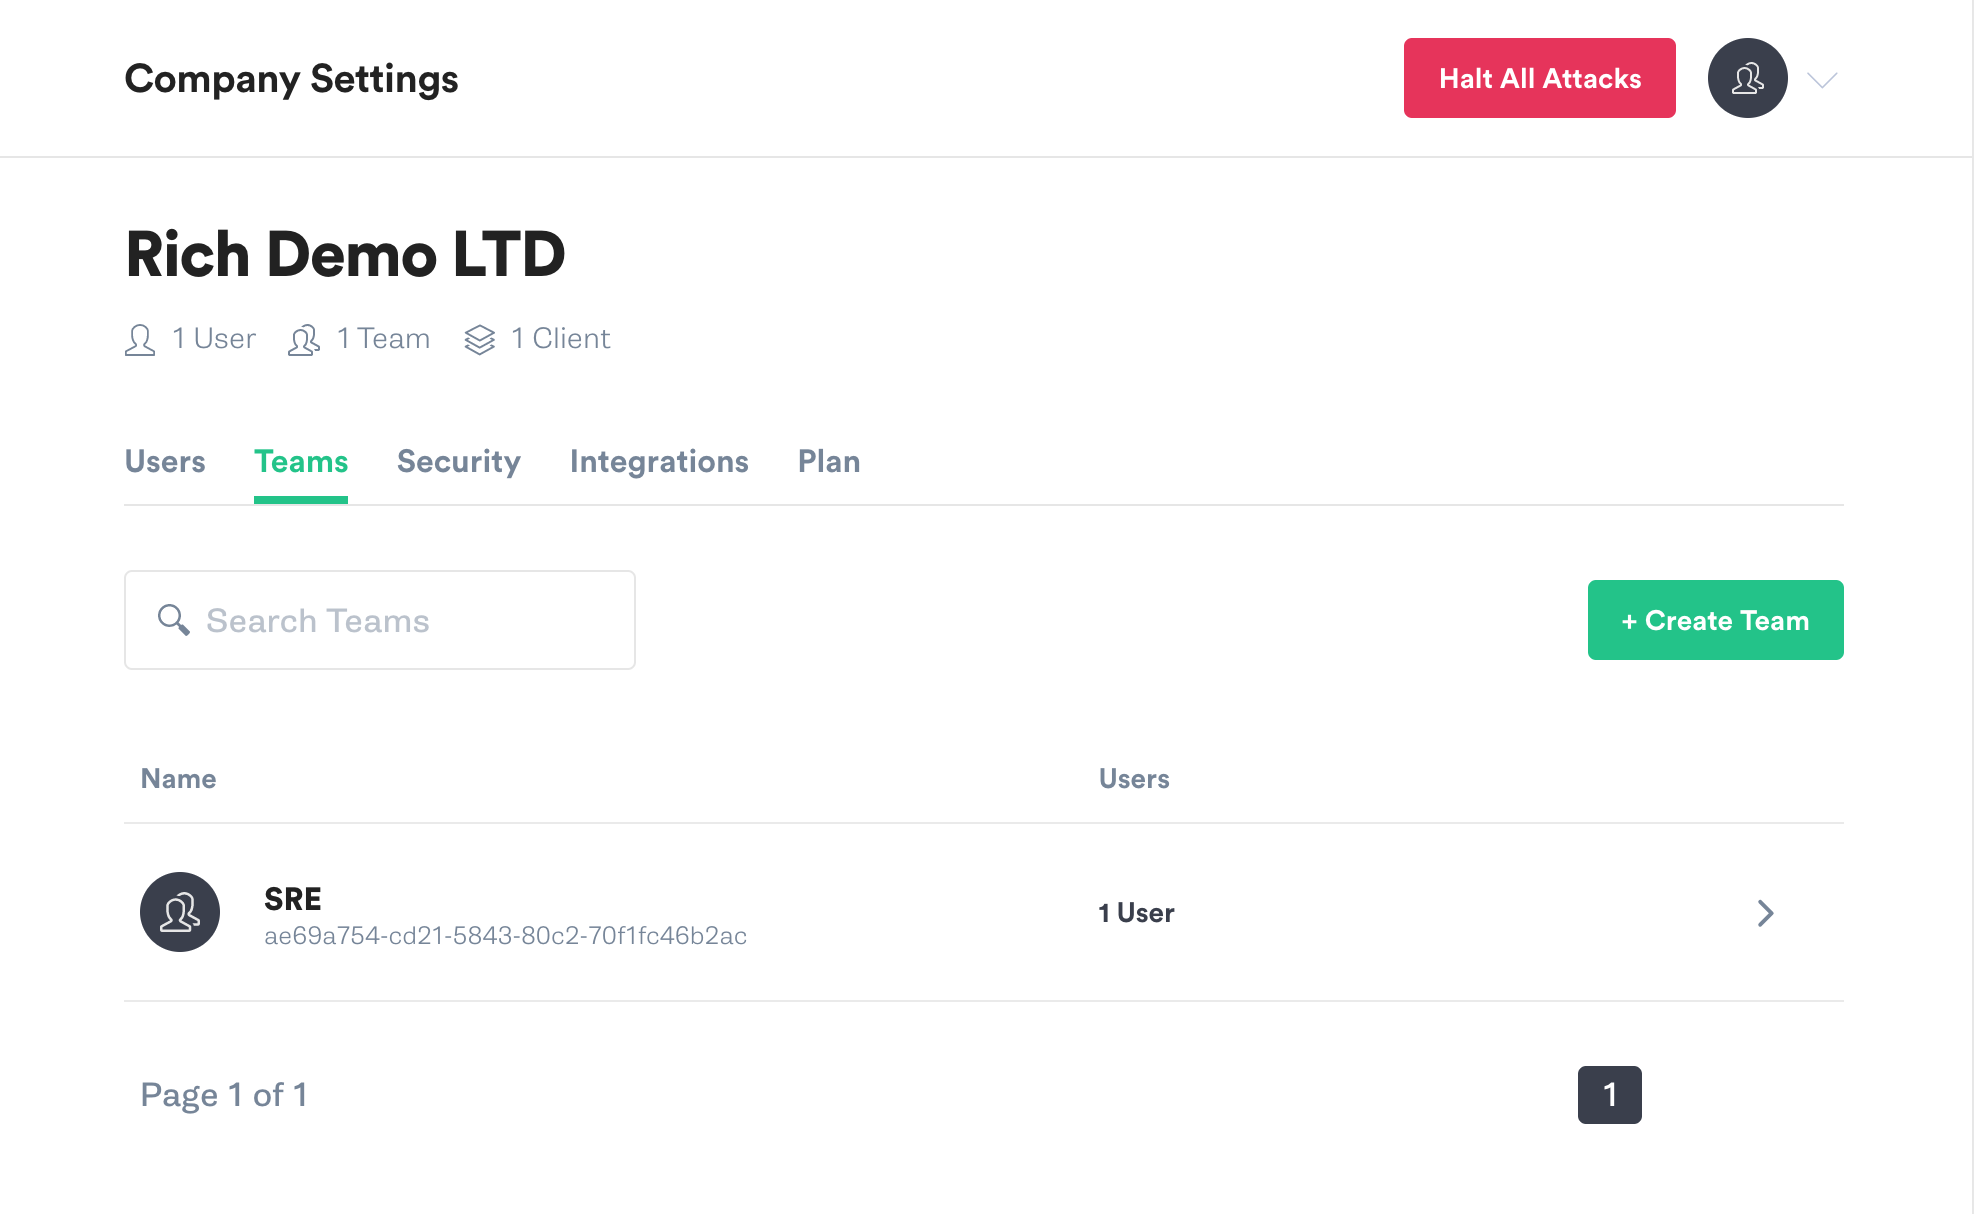
Visit the Teams page in Gremlin, and then click on your team’s name in the list.
On the Teams screen click on Configuration.
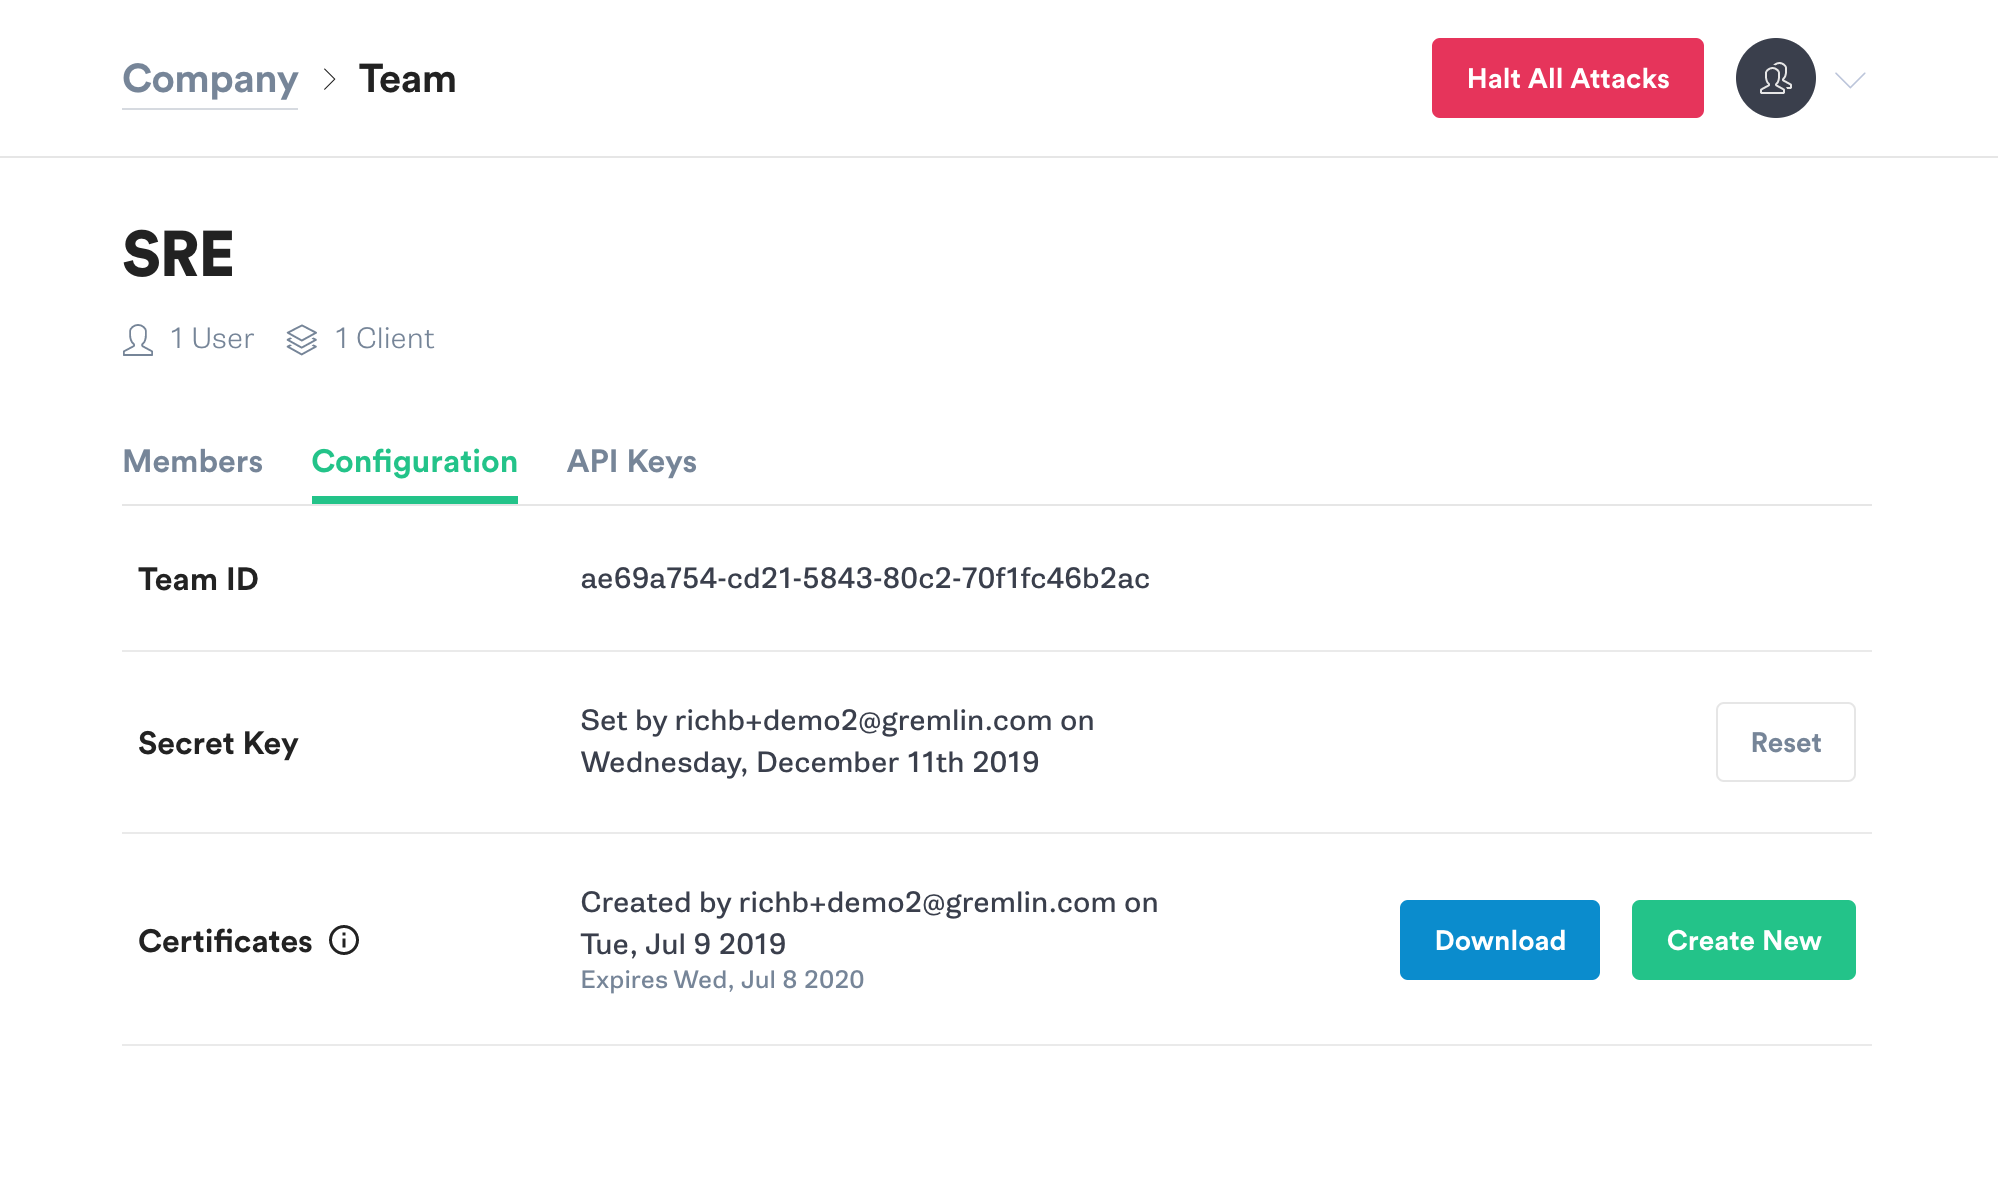
Make a note of your Team ID.
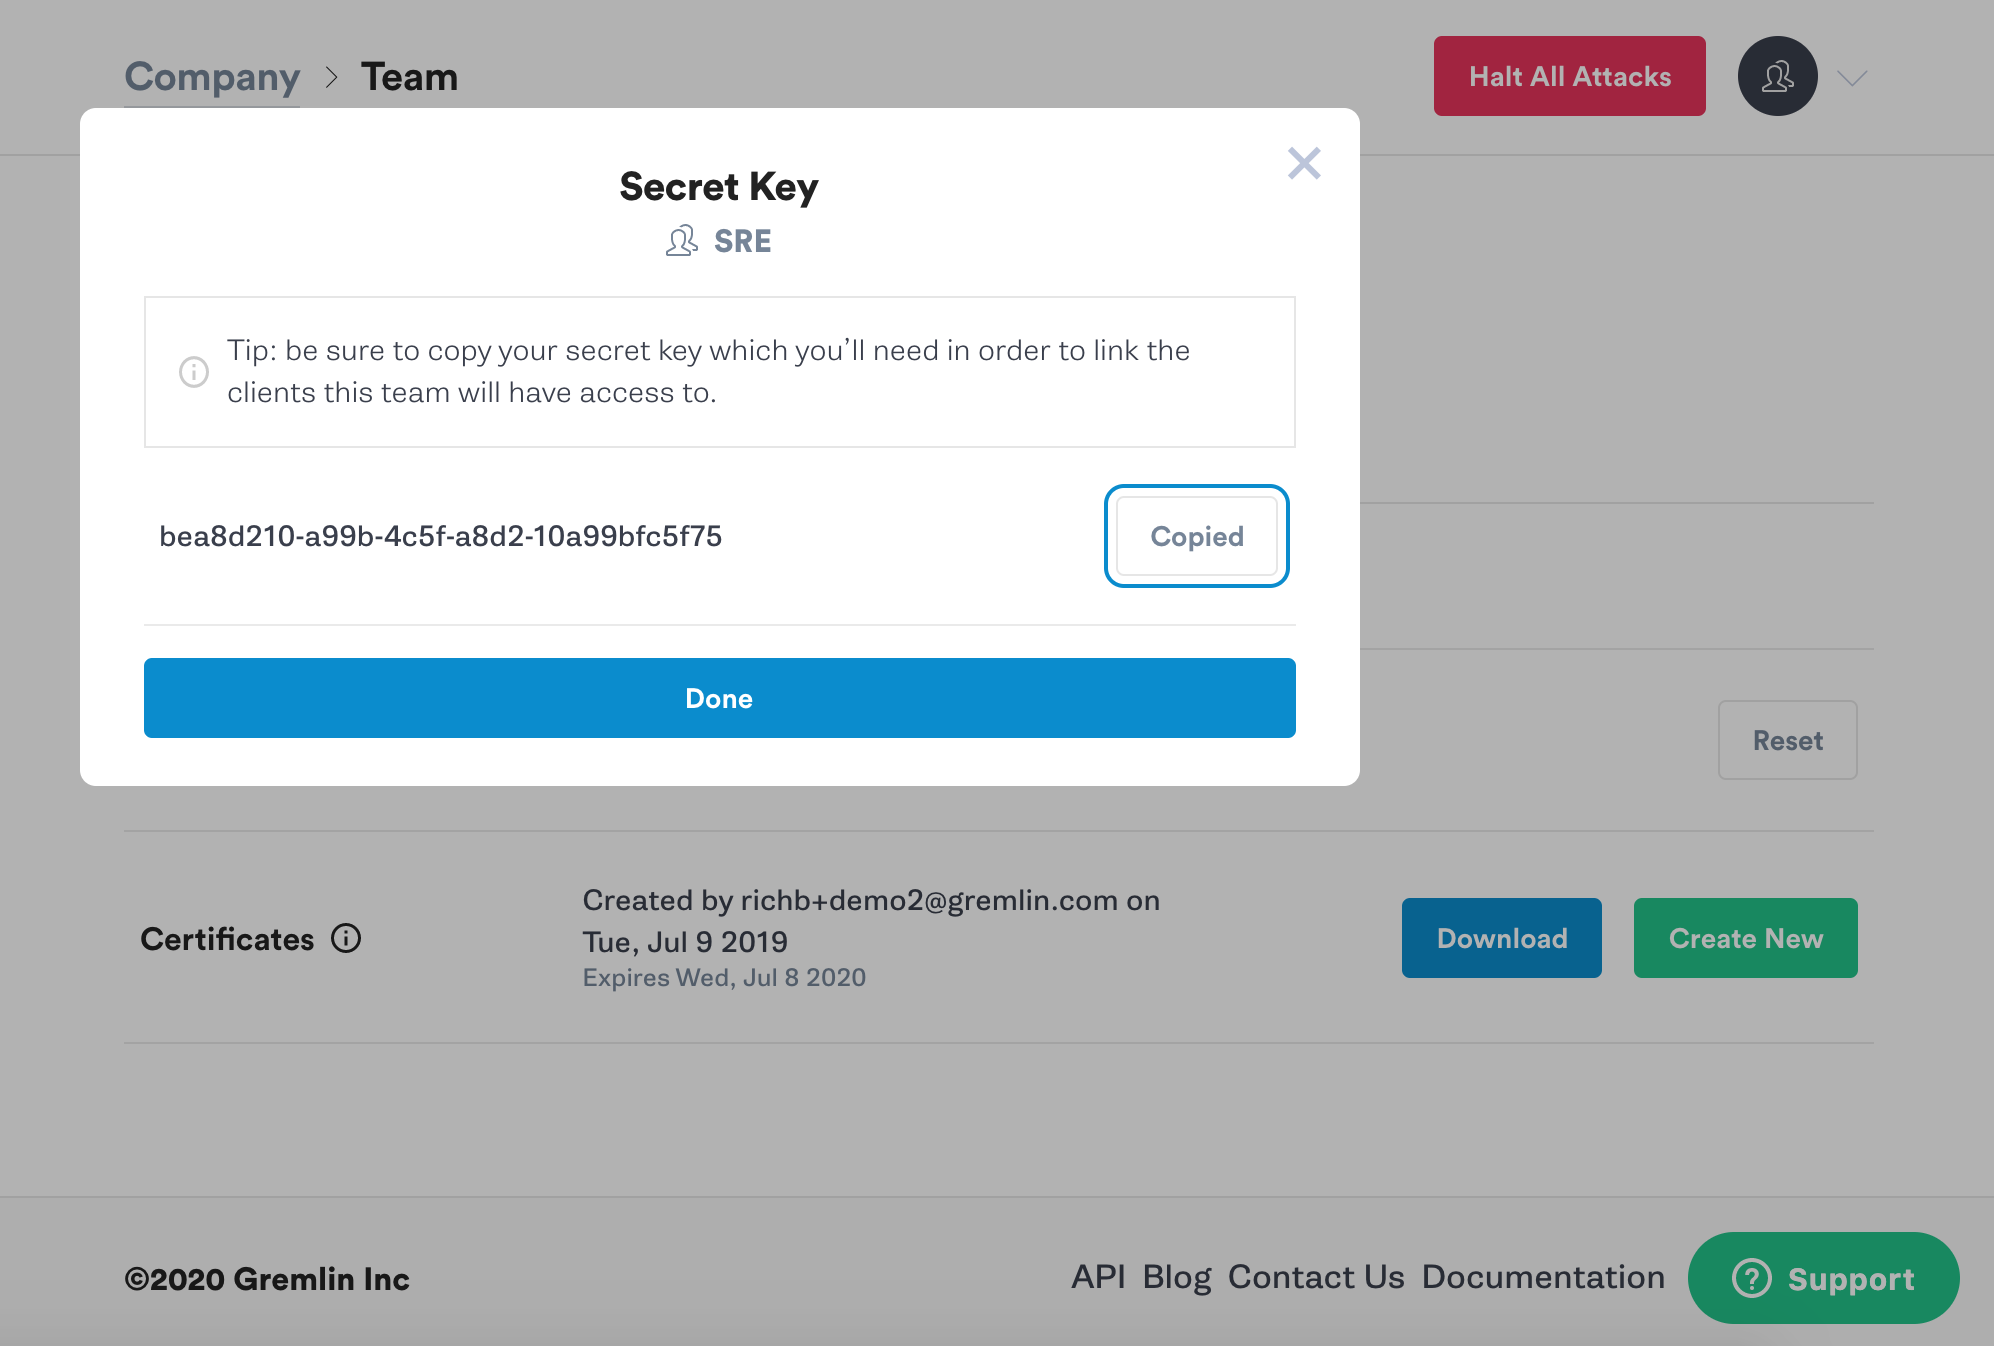
If you don’t know your Secret Key, you will need to reset it. Click the Reset button. You’ll get a popup reminding you that any running clients using the current Secret Key will need to be configured with the new key. Hit Continue.
Next you’ll see a popup screen that will show you the new Secret Key. Make a note of it.
Step 6.2 - Install the Gremlin Agent
The simplest way to install the Gremlin agent on your Kubernetes cluster is to use Helm. If you would prefer to use yaml files using kubectl directly, you can find the Gremlin Kubernetes yaml files in the Gremlin Docs.
If you do not already have Helm installed, go here to get started. Once Helm is installed and configured, the next steps are to add the Gremlin repo and install the client.
Add the Gremlin Helm chart:
1helm repo add gremlin https://helm.gremlin.com
Create a namespace for the Gremlin Kubernetes client:
1kubectl create namespace gremlin
Next you will run the helm command to install the Gremlin client. In this command there are three placeholder variables that you will need to replace with real data. Replace $GREMLIN_TEAM_ID with your Team ID from step1, and replace $GREMLIN_TEAM_SECRET with your Secret Key from step 1. Replace $GREMLIN_CLUSTER_ID with a name for the cluster.
If you are using Helm v3, run this command:
1helm install gremlin gremlin/gremlin \2 --namespace gremlin \3 --set gremlin.secret.managed=true \4 --set gremlin.secret.type=secret \5 --set gremlin.secret.teamID=$GREMLIN_TEAM_ID \6 --set gremlin.secret.clusterID=$GREMLIN_CLUSTER_ID \7 --set gremlin.secret.teamSecret=$GREMLIN_TEAM_SECRET
For older versions of Helm, use the --name option:
1helm install gremlin/gremlin \2 --name gremlin \3 --namespace gremlin \4 --set gremlin.secret.managed=true \5 --set gremlin.secret.type=secret \6 --set gremlin.secret.teamID=$GREMLIN_TEAM_ID \7 --set gremlin.secret.clusterID=$GREMLIN_CLUSTER_ID \8 --set gremlin.secret.teamSecret=$GREMLIN_TEAM_SECRET
If you’re not sure which version of Helm you’re using, run this command:
1helm version
For more information on the Gremlin Helm chart, including more configuration options, check out the chart on Github.
To install Datadog in a Kubernetes pod you can use the Datadog Kubernetes easy one-step install. It will take a few minutes for Datadog to spin up the Datadog container, collect metrics on your existing containers and display them in the Datadog App.
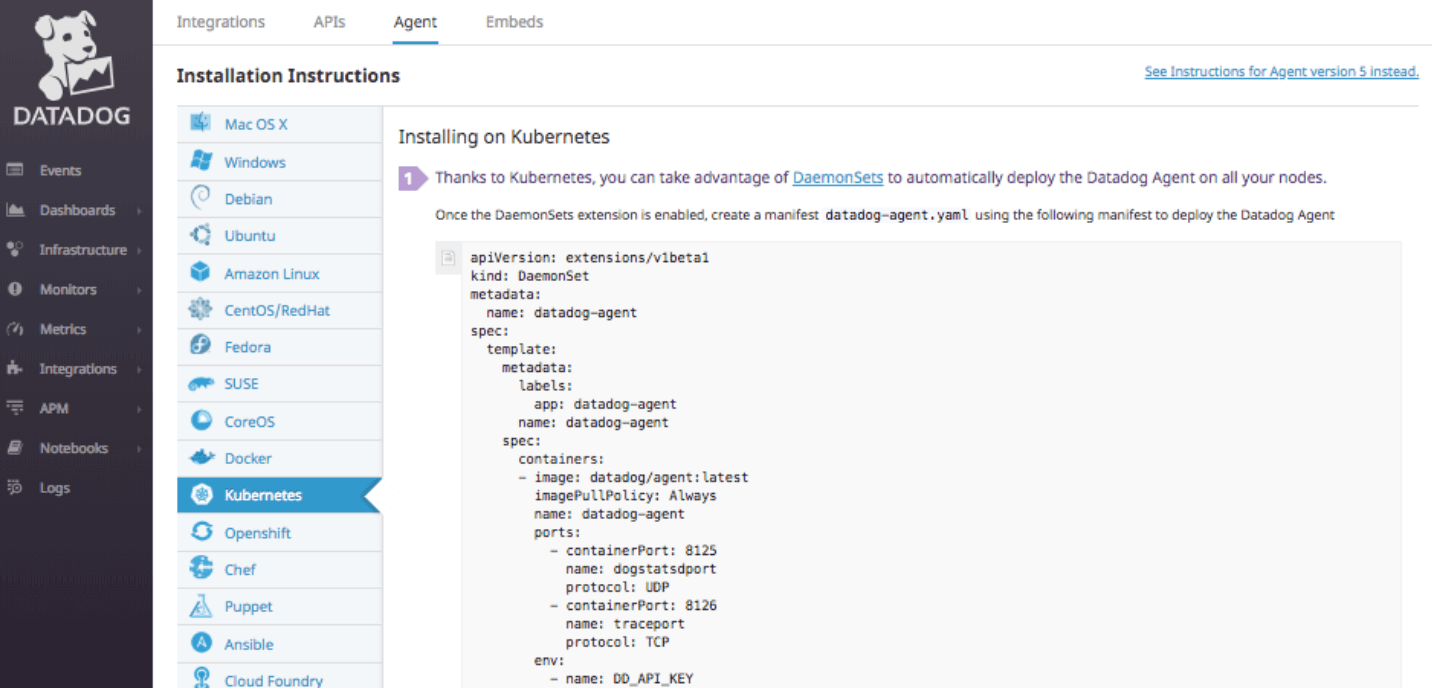
You will simple copy the Kubernetes DaemonSet, save it as datadog-agent.yaml and then run the following command:
1kubectl apply -f datadog-agent.yaml
To confirm that the Datadog agent pod is now up, run the following command:
1kubectl get pods -n default
You will see the following output:
1NAME READY STATUS RESTARTS AGE2datadog-agent-4kbq8 1/1 Running 0 1m3gremlin-tj6wl 1/1 Running 0 17m
Now you are ready to start performing your Chaos Engineering experiments. The first experiment we will run will be a packet loss attack on the front-end Kubernetes deployment for the Sock Shop.
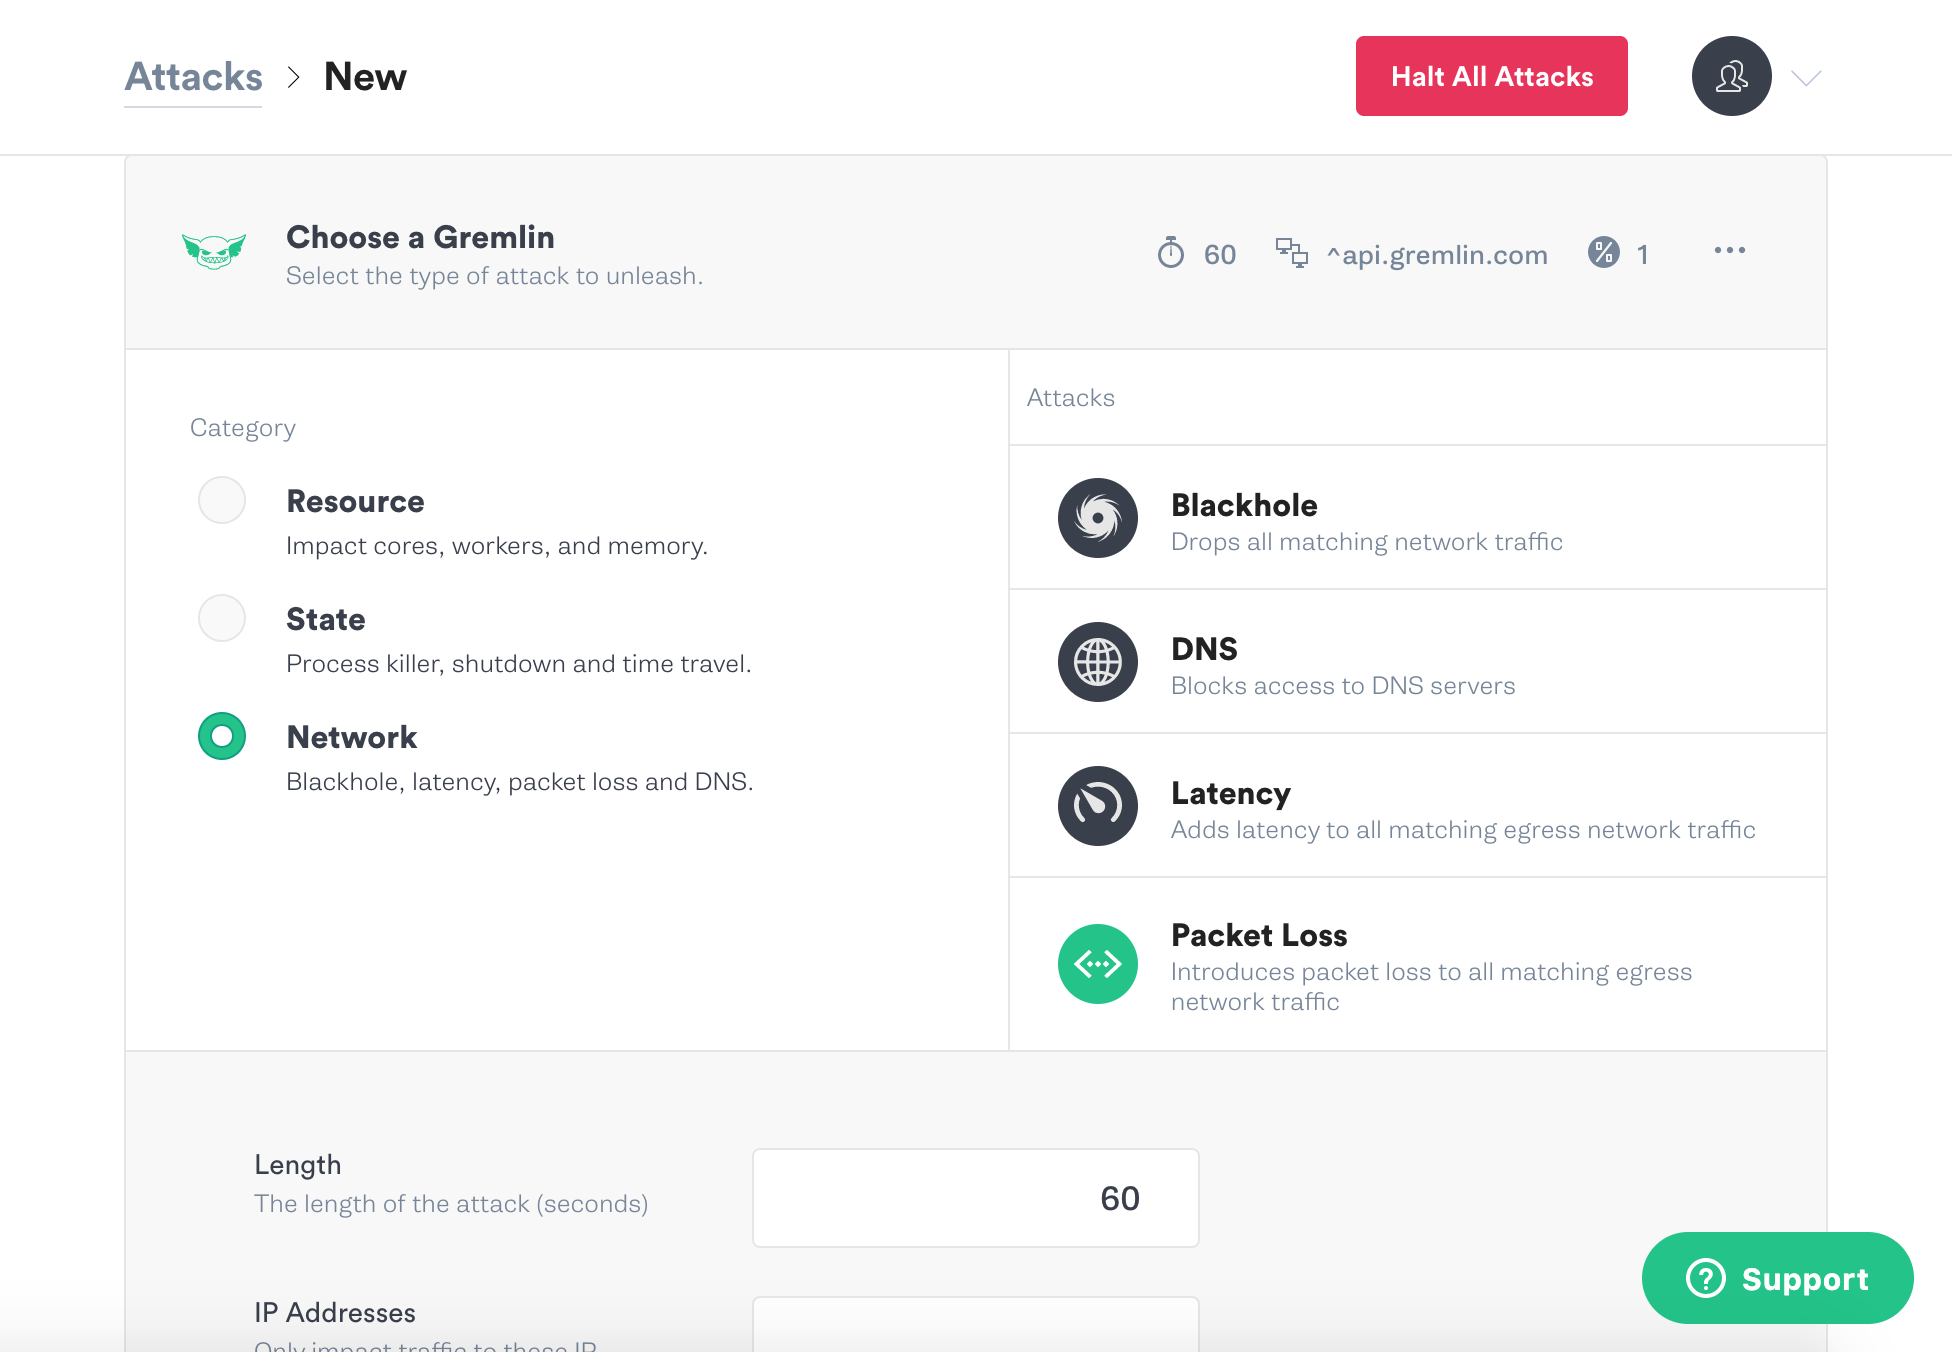
In the Gremlin UI, click on Attacks in the left navigation bar and then New Attack. Then click on Kubernetes on the right. You can select the cluster you’d like to attack, and the sock-shop namespace to filter the objects available to attack.
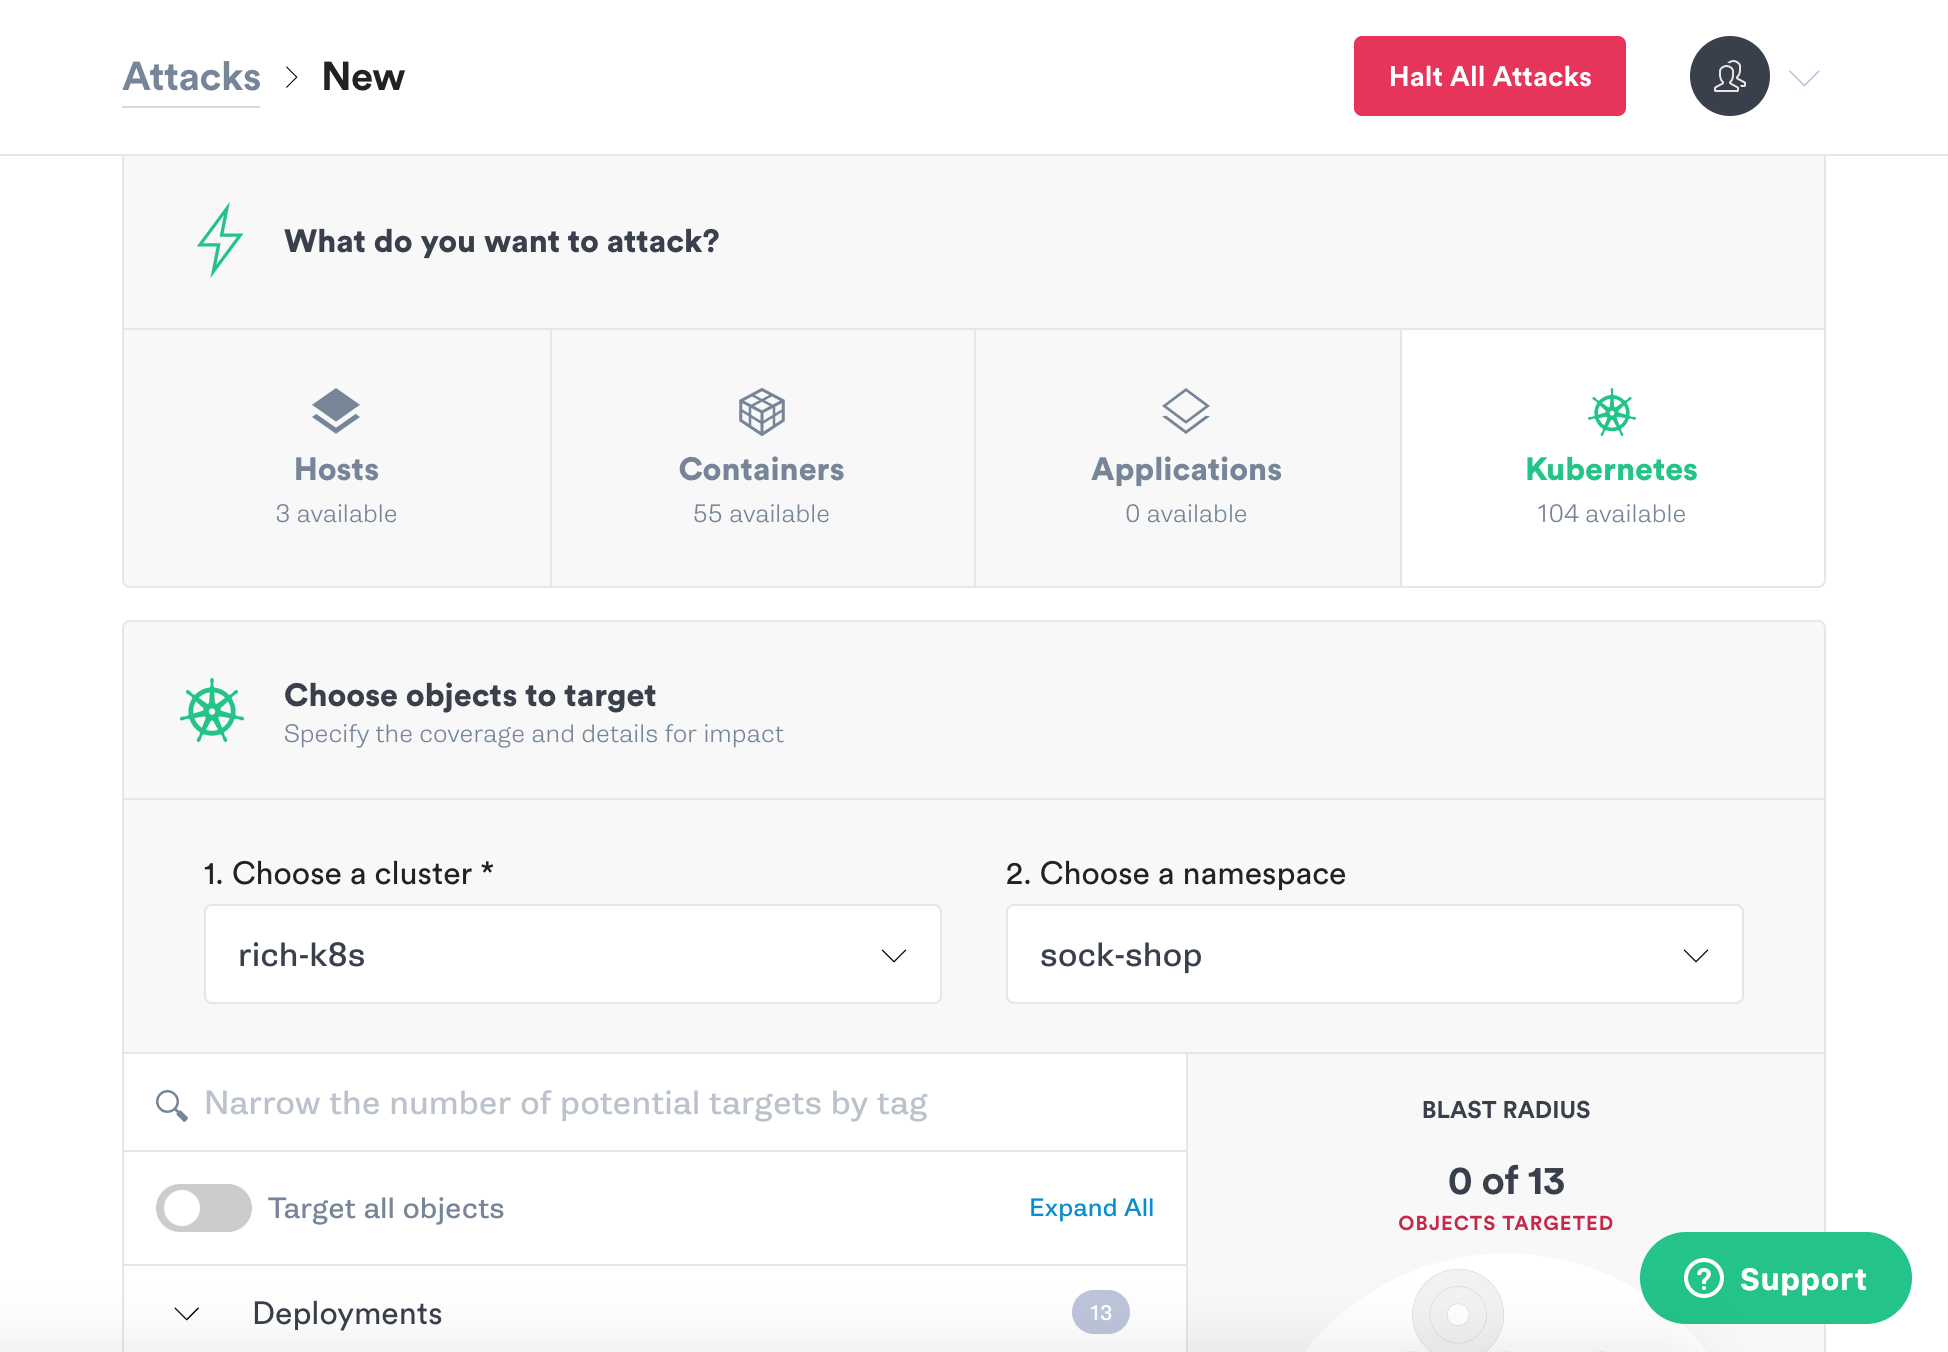
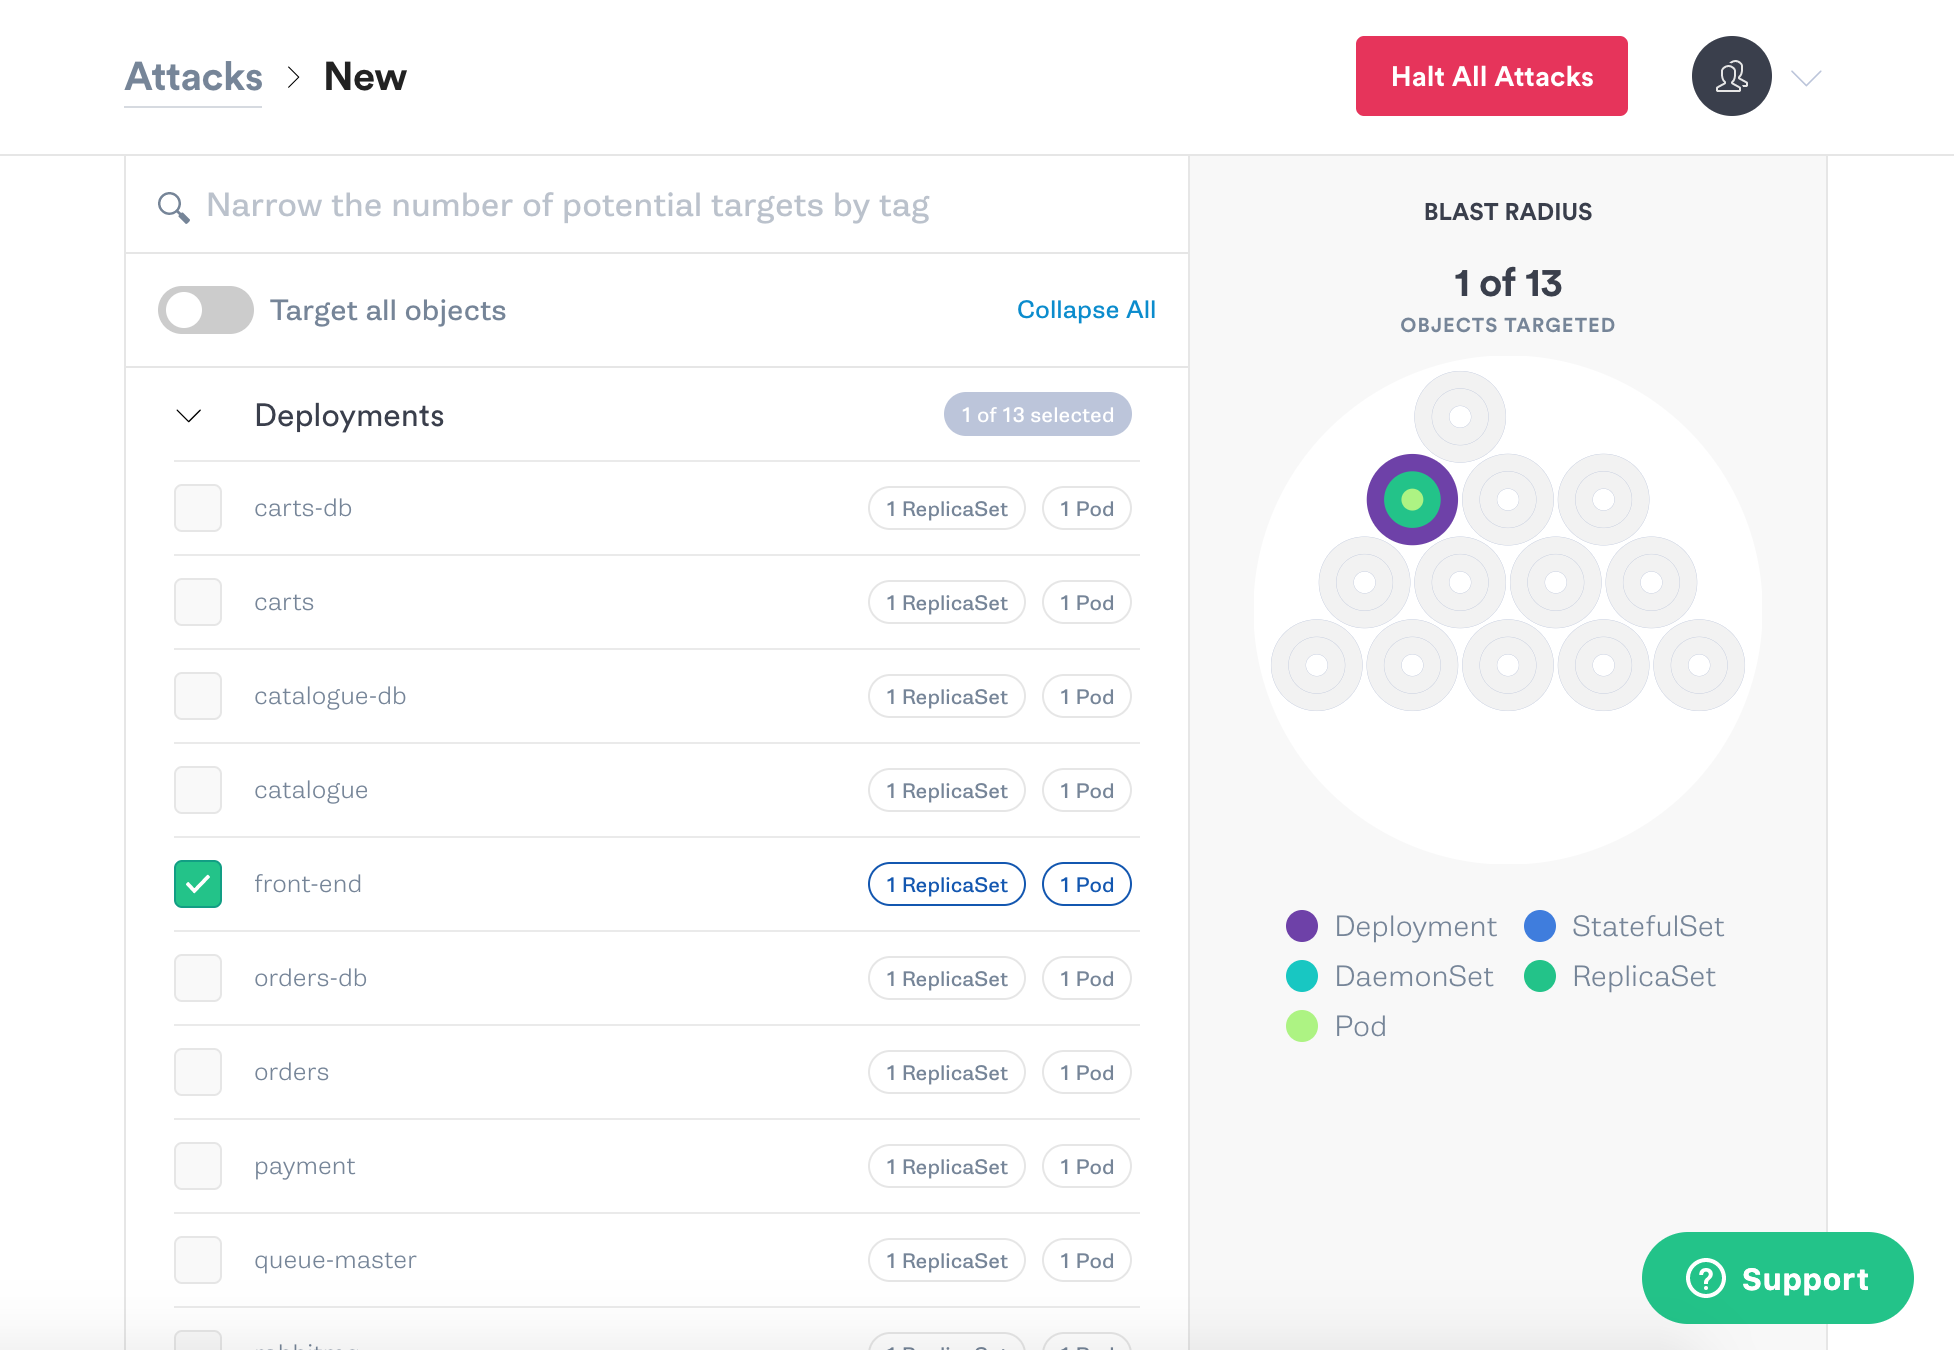
Next, click on Deployments to expand the list of Kubernetes deployments that are available, and click on front-end.
Scroll down and click Choose a Gremlin. Select Network, and Packet loss.
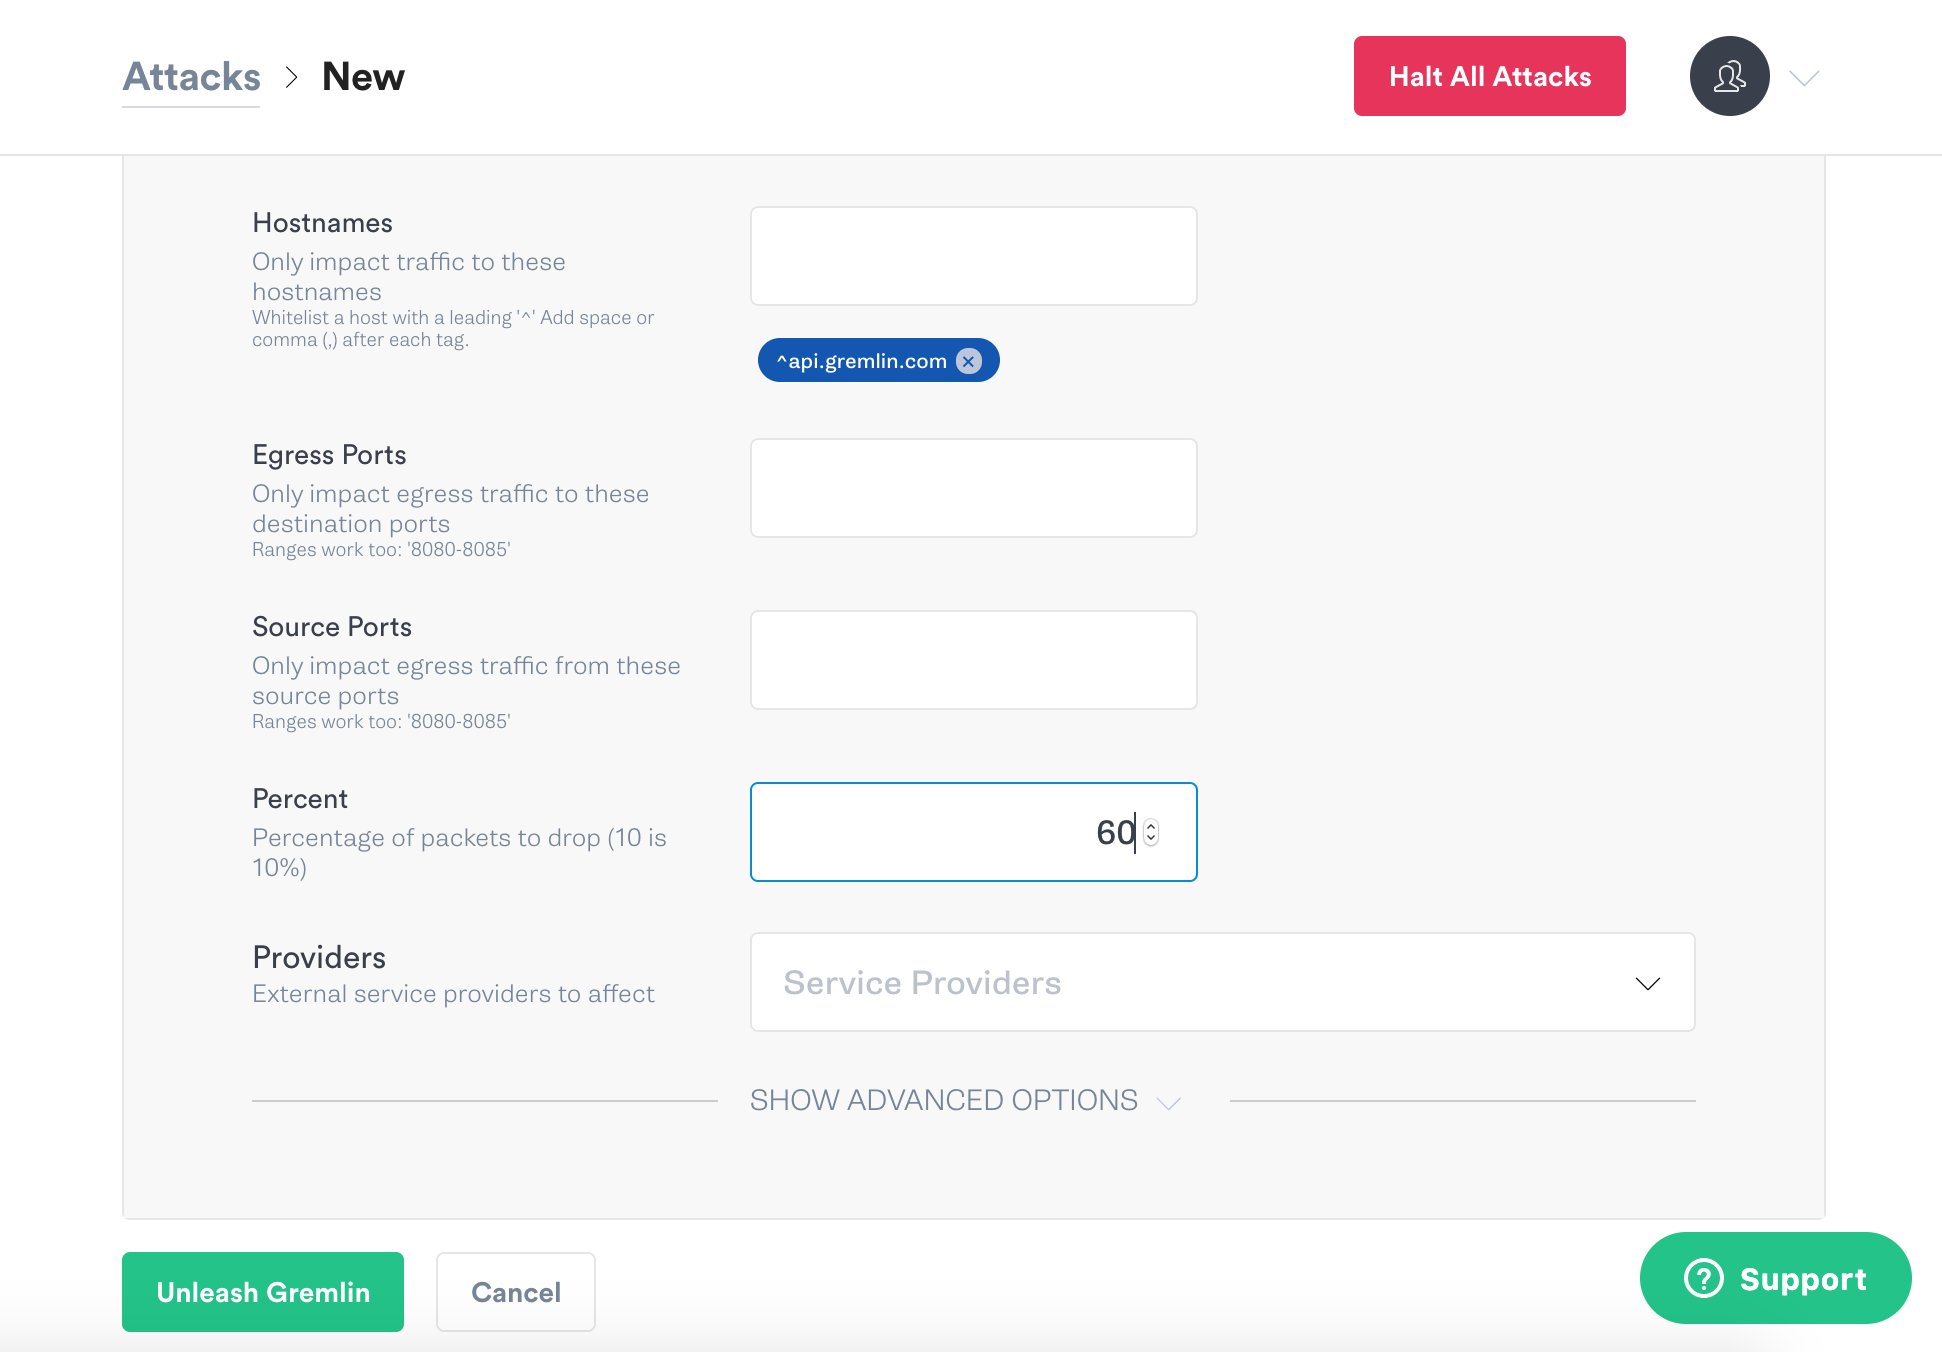
In the next section below we can customize the attack settings. Scroll down to the bottom of the list and input 60 for the percentage of packet loss to apply in the attack. Then click the green Unleash Gremlin button.
Now refresh the Sock Shop at http://localhost:30001/ and see the impact to the UI. You will notice that none of the items in the store will load.
This type of Chaos Engineering experiment enables you to see how your application handles packet loss. It also enables you to view the experience of your customer.
You have now successfully run a Chaos Engineering experiment using Gremlin which injected packet loss to a Kubernetes pod running the frontend of a microservices e-commerce store. Next, we recommend trying Kubernetes recommended scenarios in Gremlin, which you can use to simulate failures, such as a node shutdown or CPU throttle.
Share your results and swap best practices with 5,000+ engineers practicing Chaos Engineering in the Chaos Engineering Slack.

Gremlin empowers you to proactively root out failure before it causes downtime. See how you can harness chaos to build resilient systems by requesting a demo of Gremlin.
Get started