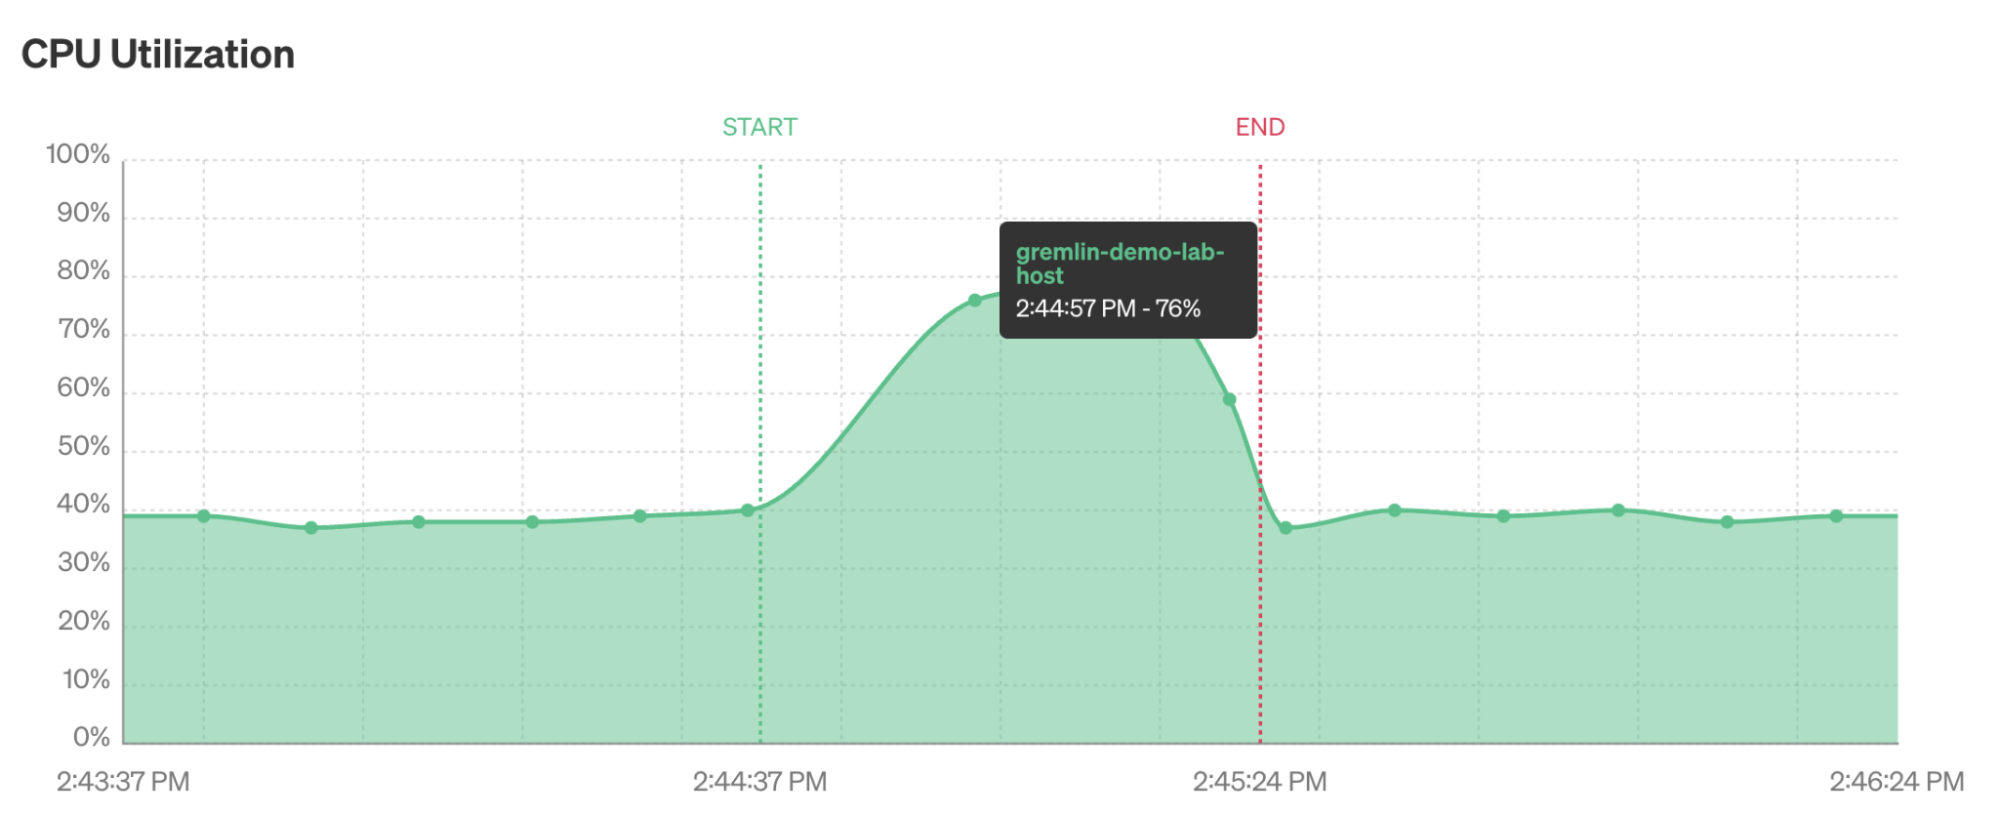
The CPU attack is one of the most common attack types run by Gremlin users. CPU attacks let you consume CPU capacity on a host, container, Kubernetes resource, or service. This might sound like a trivial exercise, but consuming even small amounts of CPU can reveal unexpected behaviors on our systems. These behaviors can manifest as poor performance, unresponsiveness, or instability.
In this blog, we’ll take an in-depth look at how CPU attacks work, why they’re so popular, and how you can use them to build resilience, improve the efficiency of your systems, reduce your operating expenses, and more.
Why should you run CPU attacks?
From a technical perspective, CPU attacks help teams ensure that systems continue operating reliably even when they have little to no available processing power. CPU usage isn’t always predictable: maybe our application is more demanding when running in production than in pre-production, or maybe we have a spike in traffic that causes an increase in CPU usage, or maybe our cloud compute instance is less powerful than we expected, resulting in lower capacity.
We can use CPU attacks to test these and other technical scenarios, such as:
- Stress testing systems and applications for software performance testing.
- Ensuring that applications and services keep running even when the CPU is starved.
- Validating monitoring and alerting solutions to make sure we can detect periods of high utilization and notify team members when necessary.
- Simulate noisy neighbors in a shared hosting environment.
These scenarios contribute to higher-level business objectives, such as:
- Validating system stability and resiliency in preparation for high traffic events like Black Friday, Cyber Monday, and other major sales holidays.
- Streamlining cloud migrations by simulating cloud conditions on-premises, such as noisy neighbors on shared infrastructure.
- Reducing operating expenses by optimizing infrastructure capacity.
To understand how this is the case, let’s explore how a CPU attack works.
How does a CPU attack work?
At its most basic level, a CPU attack simply consumes CPU resources on a host, container, Kubernetes resource, or service. Think of it like a stress test for your CPU. While a typical stress test will consume as much capacity as possible, Gremlin gives you fine-grained control over the attack, including:
- CPU Capacity: the percentage of CPU to consume on each core.
- Cores: the number of CPU cores to consume simultaneously. You can enter a specific number of cores, or select All Cores to target the entire CPU.
These attributes are called the magnitude of the attack. As with all Gremlin attacks, you can run a CPU attack on multiple systems simultaneously. This is called the blast radius.
CPU attacks are additive up to the total available CPU on the host. For example, imagine we have a host with a single CPU core. On average, this core sees 50% utilization. If we run a CPU attack with a magnitude of 25%, then the server’s CPU usage will increase to 75%. If we increase the magnitude to 50% or higher, then the CPU will max out at 100%. This is why it’s important to have visibility into the performance of your systems when running chaos experiments. While you don’t need a full observability practice, you should be able to monitor CPU usage, as this will help you determine the magnitude of your attack. Gremlin also automatically displays CPU usage metrics while the attack is running, as long as you have attack visualization enabled in your Gremlin Company and push metrics enabled on your agent.

How do you know what to configure for the blast radius and magnitude? We recommend starting small and reducing both the blast radius and magnitude as much as possible. This reduces the chance of an unintended or unexpected side effect—such as your systems becoming unresponsive—which lets you focus on the experiment at hand. Once you understand how your systems behave in a small-scale experiment, gradually increase the scale until you’re consuming a larger amount of CPU capacity across more systems.
It depends on the type of experiment you want to run. For example, if you’re trying to stress test your systems, it makes sense to start by consuming as much CPU as possible across all of your nodes. However, if you’re testing a specific scenario, such as triggering an alert in your monitoring tool, you should adjust your magnitude to consume just enough CPU to trigger the alert without overtaxing your systems.
As you run these experiments, remember to record your observations in the Gremlin web app, discuss the outcomes with your team, and track any changes or improvements made to your systems as a result. This way, you can demonstrate the value of the experiments you’ve run to your team and to the rest of the organization.
Get started with CPU attacks
Now that you know how a CPU attack works, try running one for yourself:
- Log into your Gremlin account (or sign up for a Gremlin Free account).
- Select a host to target. Start with a single host to limit your blast radius.
- Under Choose a Gremlin, select the Resource category, then select CPU.
- Enter the percentage to consume in the CPU Capacity box, then enter the number of cores (or select All Cores). Start with a small amount, like
10–20%. - Click Unleash Gremlin to start the attack.
If you’d like a more guided approach, Gremlin provides Recommended Scenarios to guide you through different use cases including validating your monitoring and alerting configuration, testing auto scaling, and simulating a throttled CPU. Try out an autoscaling Scenario by clicking "Run Scenario" below:


